37. to Use Midjourney: Step-by-Step Guide to Creating Stunning AI Art
How to Use Midjourney: Step-by-Step Guide to Creating Stunning AI Art
Midjourney is the most powerful AI-powered image creation app. This guide will teach you how to use it and create outstanding visuals
 August 7, 2024
 12 minute reading
More than 34 million AI images are generated every day. This mind-boggling number shows just how fast the technology is expanding into our everyday lives.
Midjourney is one of the top AI-powered transformative technologies, and accounts for more than 26% of AI-generated images.
Midjourney has over 17.04 million registered users in its Discord server for a reason: Most familiar with AI image generation technologies say Midjourney is the leader in image quality and realism compared to other AI tools like DALL-E or Adobe Firefly. It can create images of equal quality to those produced by the best photographers, artists, and designers.
Midjourney is so transformative, it’s like having a fully staffed top creative studio at your fingertips, capable of creating any visuals you need to attract your customers’ attention.
We made this easy-to-follow step-by-step tutorial for newbies to help you join this AI revolution.
How to use Midjourney
Using Midjourney is relatively simple, but understanding each step ensures you can create impressive AI-generated artwork. Here's a step-by-step guide on how to get started with Midjourney and produce your first images.
Job
Step 1. Set up Discord and Midjourney accounts
Midjourney is designed to be user-friendly and accessible. It doesn’t require any specific hardware, operating systems, or powerful resources. To get started, all you need is a browser and an internet connection.
It does, however, require a Discord account, an online chat platform, where your initial work will take place.
Job
Create a Discord account
Creating a Discord account for Midjourney is a breeze. Simply head to Discord’s website and click “Open Discord in a browser window.” At the bottom of the login window, click “Register” and follow the simple steps and verification procedure. Once registration is complete, a chat window appears.
Sign up with Midjourney
Go to the website and click “Join the Beta” in the bottom right corner. A new window with the button “Accept the Invite” will open. Click it, follow the subscription steps, and choose the plan best suited to you.

This lands you on the Discord site with the Midjourney AI ready for use.
Join the Midjourney Discord server
On the Discord site, the uppermost icon on the left toolbar is “Direct Messages.” Click on it and locate the Midjourney bot in the direct message window. Click on “Midjourney Bot” to open a message:

Now you’re ready to work with Midjourney.
Step 2. Learn the basic Midjourney commands
The Midjourney AI art application is designed to be user-friendly. The Discord interface guides you with commands when you need them. All commands are entered in a message field at the bottom of the Discord window, ensuring a seamless experience.
Each command starts with a forward slash (/). Just type it in a message field, and a pop-up will give you a list of suggested commands. The most frequently used one appears at the top.
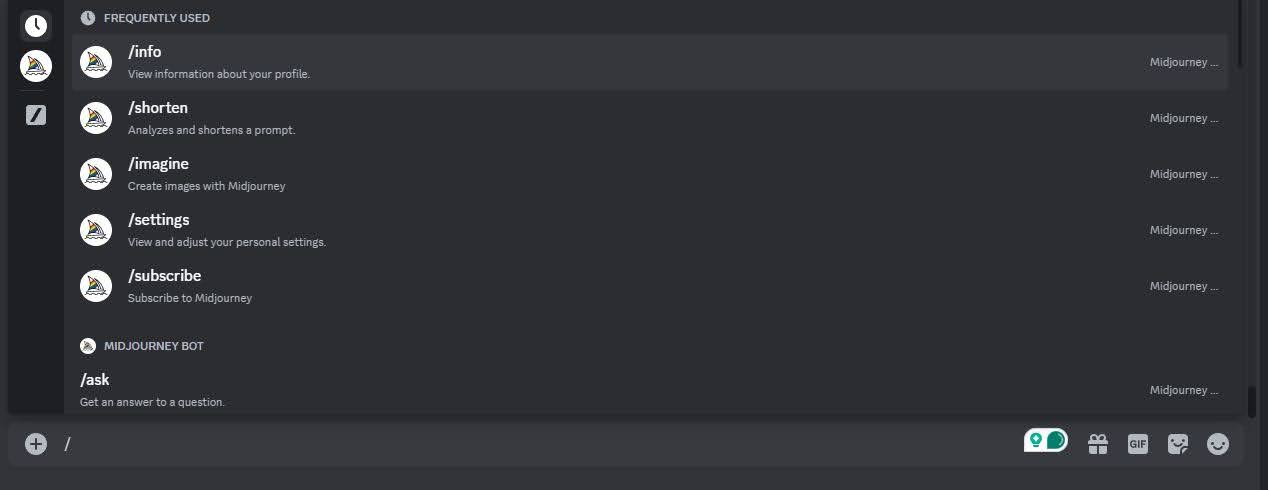
If you want to create a new image, start your prompt by entering the command “/imagine,” followed by the description of the image you want to create.
Here is a list and description of the most useful Midjourney commands you’ll need:
/imagine — Used to create images with Midjourney.
/settings — Opens a special settings window, where you can set your preferred parameters and other relevant controls.
/info — Gives basic information about your account status, including the number of images created and the number of computational hours used and still available for you.
/describe — Allows you to upload or give a URL to an image that you want to replicate. The /describe command provides a few possible prompts that could create similar images.
/blend — Lets you blend two or more images into a new image. This could be useful in creating original images without complex prompting.
/help — Allows you to access basic help.
There are many more Midjourney Art commands available, which appear every time you type a forward slash into a chat window.
Step 3. Create your first images
Now that we have a basic understanding of how to enter commands, we can start with what this incredible AI art application is all about—creating images.

Let’s start with something simple:
/imagine a cute puppy playing in the grass.
Hit the Enter key, and Midjourney AI gets to work and creates a grid of four images.

Let us try again, this time adding information about the light. Photographers love the evening light when the sun just touches the horizon. It gives warm colors and nice shadows to the images. Photographers’ term for this light is “a golden hour,” so we can use it in the prompt too:
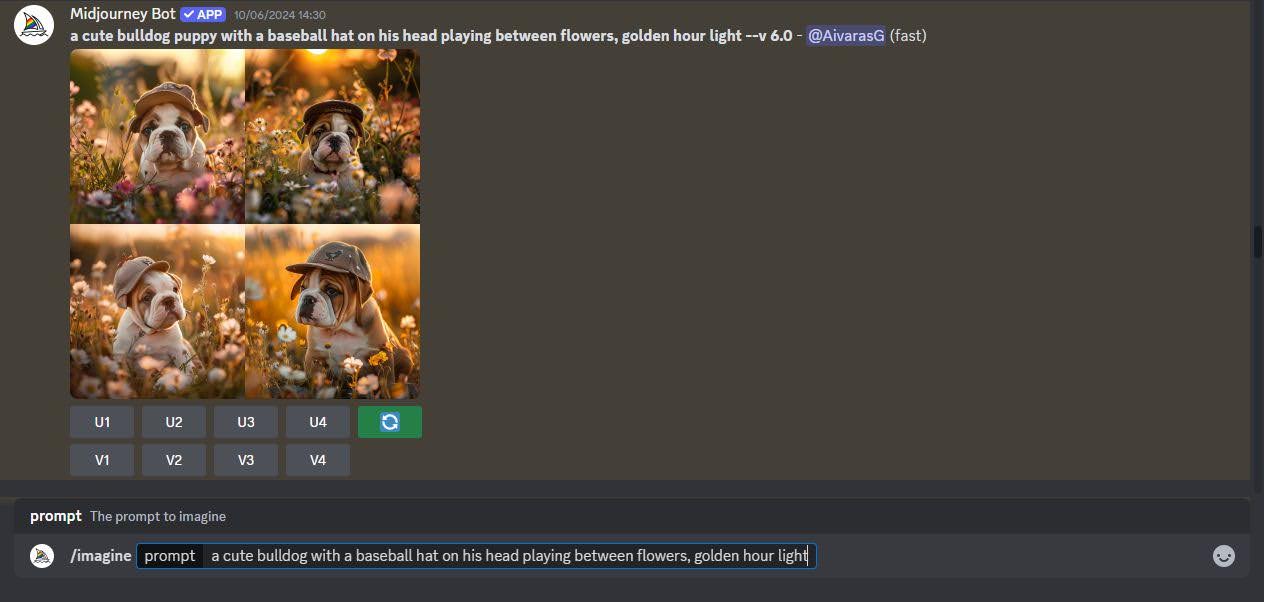
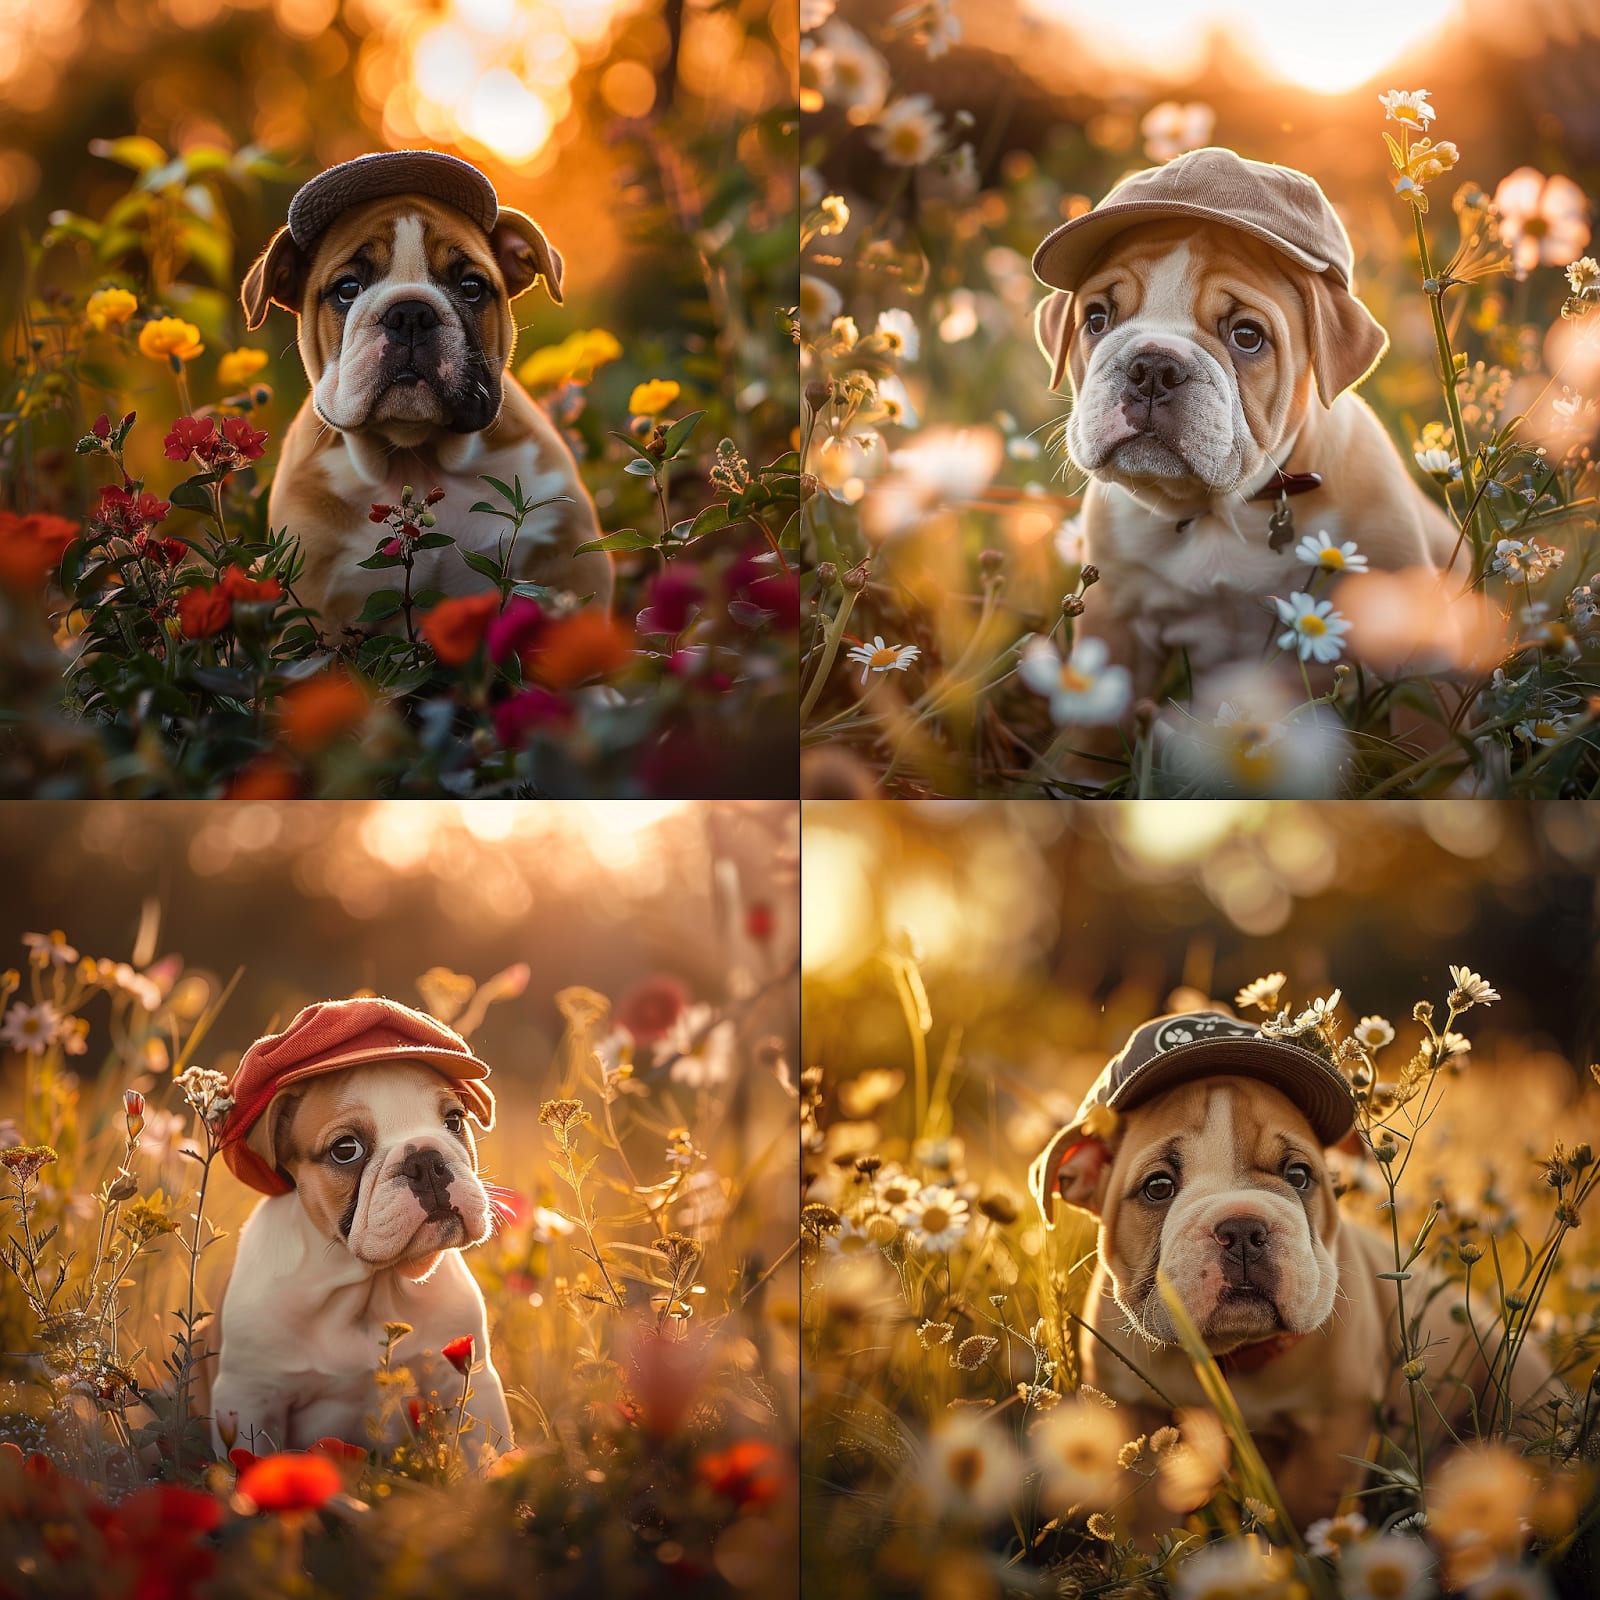
/imagine a cute bulldog puppy with a baseball hat on his head playing between flowers, golden hour light.
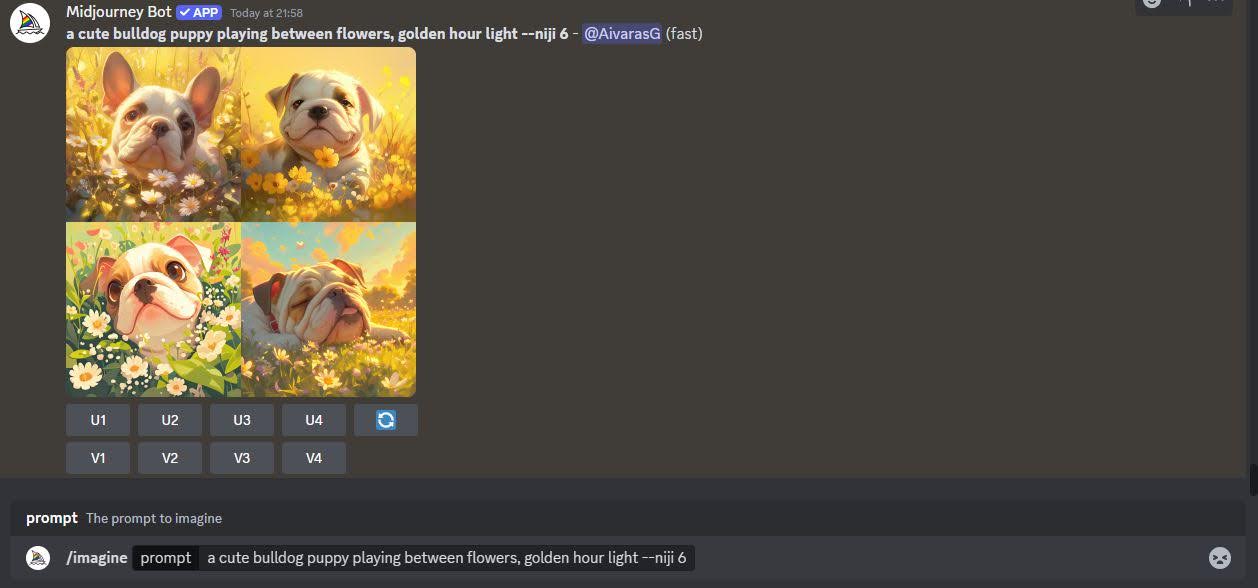
This time, we get much better results, clearly illustrating how adding detail to your prompts improves images.
The most effective strategy for creating stunning Midjourney images is to structure your prompt in a clear and specific order. Start with the subject, then move on to its characteristics or descriptive features, what it’s doing, the location, the environment, the lighting, and finally, the technique or style. This method of organization makes it easier to understand, modify, and expand your image description as needed.
It is important to be as specific with your words as possible when prompting Midjourney. That is where art and photography terminology becomes very useful.
In our example, we used the photographic term “golden hour.” Two words replaced a lengthy description of colors and light. Using effective keywords and terms is crucial to successful image creation in Midjourney.
That may sound a bit complicated, but fortunately, the rise of generative AI has created a big demand for concentrated knowledge about artistic and photographic styles and techniques. If you type a simple question like, “What are the most popular artistic styles” or “What are the terms of photographic illumination” into Google, ChatGPT, or Perplexity AI, they will give you a well-explained list of excellent keywords to use in your prompts.
Job
Step 4. Set parameters to define the style and look
Midjourney generates unique and stunning images because it allows customization. There are quite a few parameters the user can control. These parameters influence the style and look, as well as define several crucial properties of the image, like its proportions.
Job
Parameters should be used at the end of the text prompt and start with a double hyphen, followed by the parameter, space, and then the value, like this:
--stylize 300.
Prompts can contain many parameters. For example:
/imagine a cute bulldog puppy playing in the flowers --ar 3:4 --weird 20 --chaos 50 --stylize 300 --v 6

Let’s go through the most important parameters of the Midjourney AI art generator and what they do.
Aspect Ratio (AR)
This parameter defines the format of your picture, from a very wide, narrow screen type to a tall portrait mode. It takes a ratio of two numbers as a value, for example—ar 16:9.
Common aspect ratios include:
16:9 for wide, cinematic images
1:1: for square images
2:1, 16:9, 3:2, 4:3, and 6:5 for horizontal or landscape format images
1:2, 9:6, 2:3, 3:4, and 5:6 for vertical or portrait format images
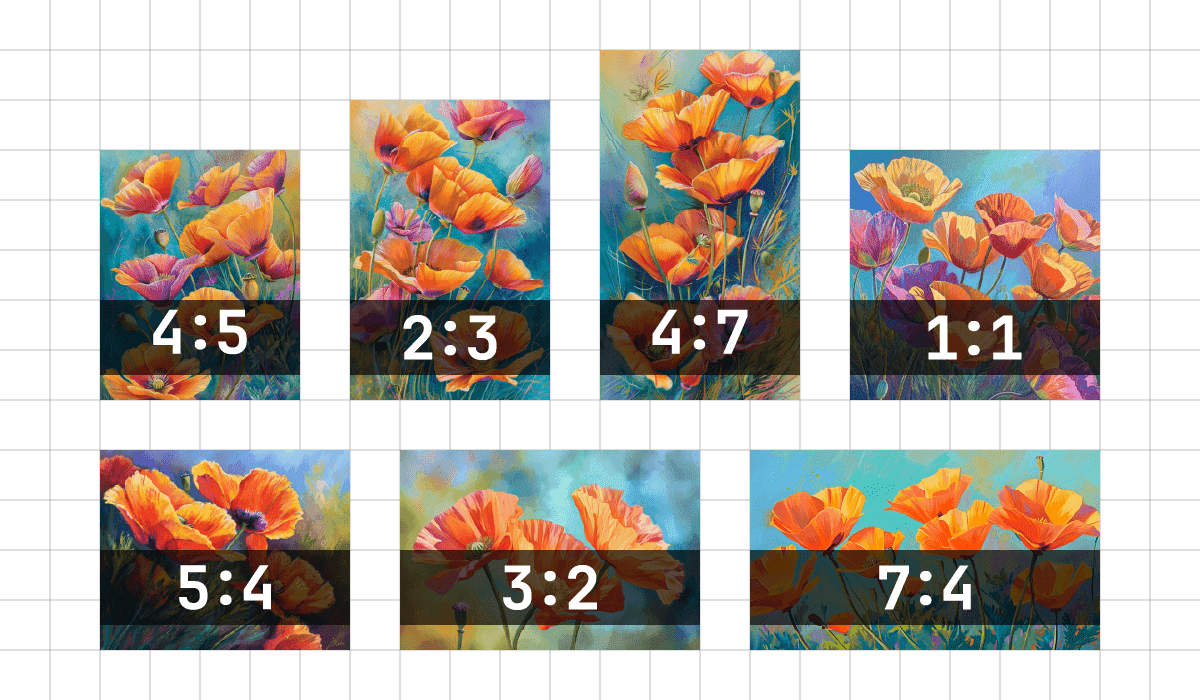
Choosing the right aspect ratio for your Midjourney images is a crucial step. It is easier to create nice landscapes, cityscapes, and similar images with a horizontal format. Portraits, human figures, flowers in a vase, and so on work better in vertical formats.
Job
Stylize parameter
Midjourney was trained to create images that favor the artistic interpretation of colors, compositions, and forms. The “stylize” parameter controls how strongly this artistic interpretation is applied. Low “stylize” values create more realistic images with more realistic people, resembling average camera shots by average people.
Job
High “stylize” values create more professional-looking images or artwork. But high aesthetic interpretation comes at a price: lower adherence to actual prompts. Midjourney, when instructed to use high “stylize” values, is likelier to skip details in the prompt and interpret the prompt loosely and artistically.
Job
This parameter takes values anywhere from 0 to 1,000. The best practice is to start working with low values of 50 or 100 and increase them if needed. Like other parameters, stylize values are set at the end of the prompt, like this:
--stylize 50.
Chaos parameter
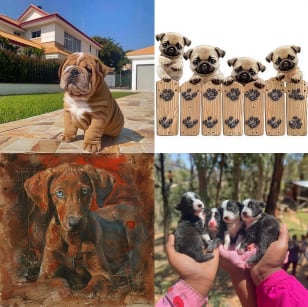
This art tool always creates a grid of four images when prompted. The chaos parameter controls how different the four images in the grid are. It could be helpful when experimenting with Midjourney styles or looking for original ideas.
This parameter, which can be adjusted between 0 and 100, is in your hands. By keeping it at the default value, you can ensure that Midjourney closely follows your prompt. But, if you’re feeling adventurous, setting it to high values leads to more unconventional and surprising outcomes, giving you full control over the creative chaos.
Here is an example of the prompt:
/imagine a cute bulldog puppy --chaos 100
The image shows how much more varied the grid is compared to our original creation.

Weird parameter
The weird parameter is an interesting and experimental feature of the Midjourney art creator. It introduces unexpected and unconventional properties to the images, which can be harnessed to create truly unique artwork.
As odd as it sounds, it could be useful even when you create images intended to be perfect. In small values, weird can add a strange but attractive detail, or create distinctive styling.
The weird parameter can be set to values between 0 and 3,000. A lower value introduces subtle and intriguing details, while a higher value produces more pronounced and unusual effects.
Here is an example of a prompt and result using this parameter:
/imagine a cute bulldog puppy --weird 1000
Versions
Midjourney V6 is the program’s latest version. However, the platform lets you use older versions, as well as its Niji model, which is trained on anime-style images.
Midjourney’s older versions are interesting mostly for comparison and playing. However, many users still prefer the aesthetics of version 5.2 and tend to use it more than the latest.
Job
The Niji model is better at creating images in illustration or cartoon style and depicting action. It can also create photorealistic images that are more dynamic and expressive than versions 5.2 or 6.
Version 6 is set as default, but you can select the preferred model and version in your settings window.

You can also specify the version number directly in the prompt by using the “--v” (version number) parameter.
Add “-v 5.2” to use an older version of Midjourney in the prompt. To use the Niji model, type “--niji 6.”
Here, a screenshot shows how simply changing the version of Midjourney produces a totally different, more cartoon-like result.
Negative prompts
Negative prompts play a crucial role in image generation, allowing you to exclude specific elements. Whether it’s objects, colors, or characteristics, these prompts are your key to precision.
Job
This parameter, like others, starts with a double hyphen and “no,” followed by comma-separated words. Here’s one example of the negative Midjourney prompts:
/imagine a cute bulldog puppy playing between flowers, golden hour light --no grass.
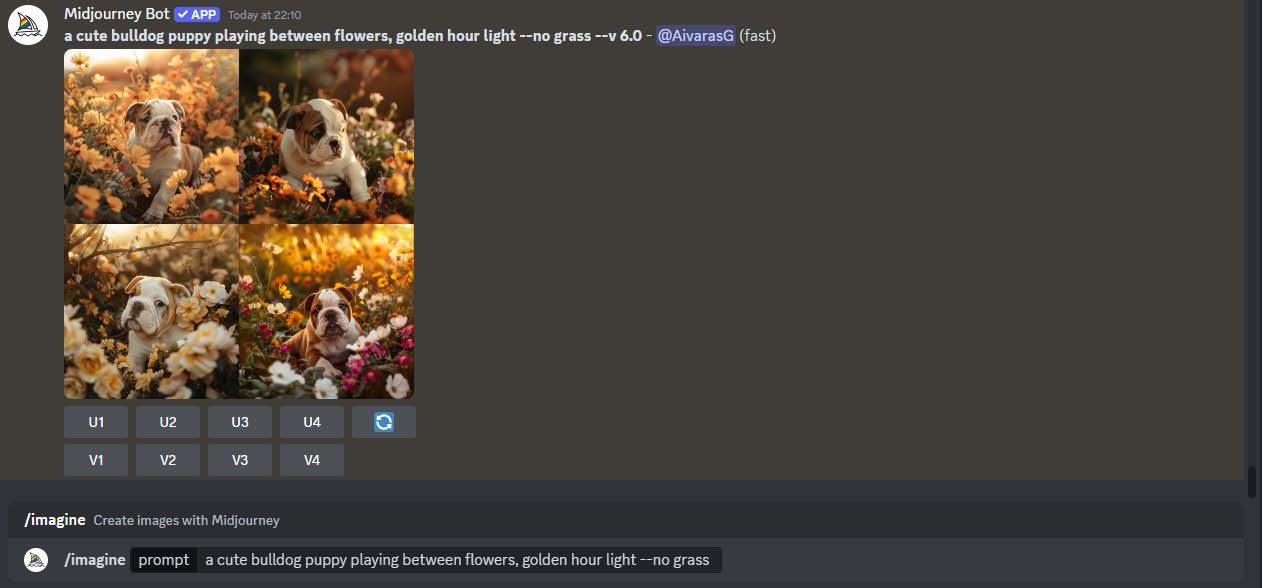
This grid of images, with a negative “no grass” prompt, creates a more flowery and less grass-field look.
The negative prompt is a powerful tool that allows you to focus on what you truly want to see in your generated images. By excluding elements that are not of interest, you can streamline your image creation process and avoid wasting time on unwanted results.
Job
Step 5. Save your generated images
Now that we’ve covered how to write and modify prompts, and how to create images, we need a way to save them.
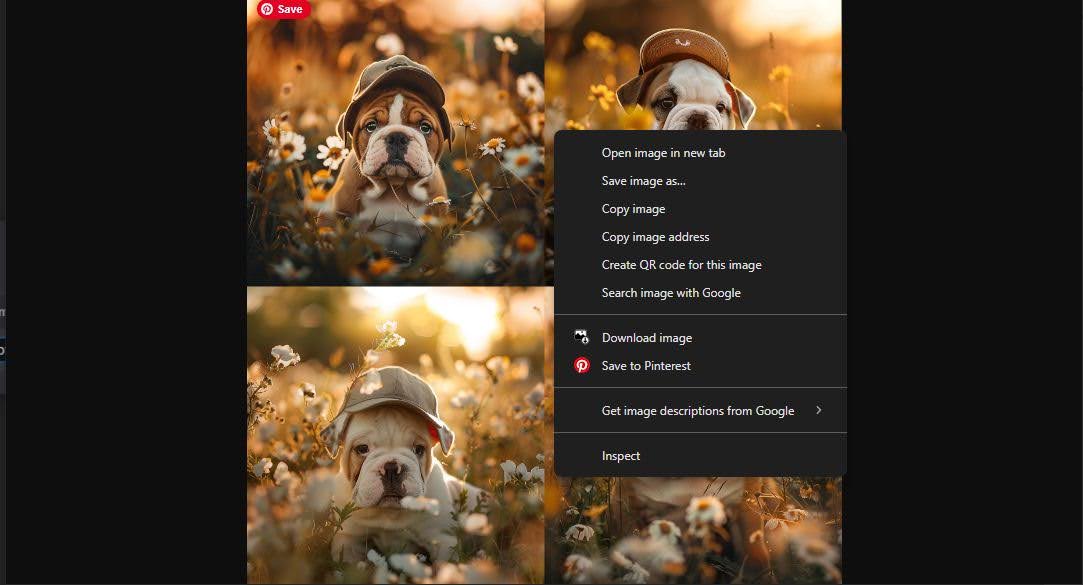
Midjourney AI always generates a grid of four images, and if you click on it, a larger version of the grid pops up with “Open in browser '' underneath.
Saving your images is very straightforward. Simply click on the “Open in Browser” link to view your grid of four images in a new browser window. From there, you can right-click on the image you want and select “Save Image.”
If you only want to save one specific image from the grid, you can use the Upscale button.
The four images in the grid are numbered from left to right. The images in the upper row are 1 and 2, and in the bottom row, 3 and 4. Buttons underneath the Midjourney AI art tool are labeled to correspond to these images.
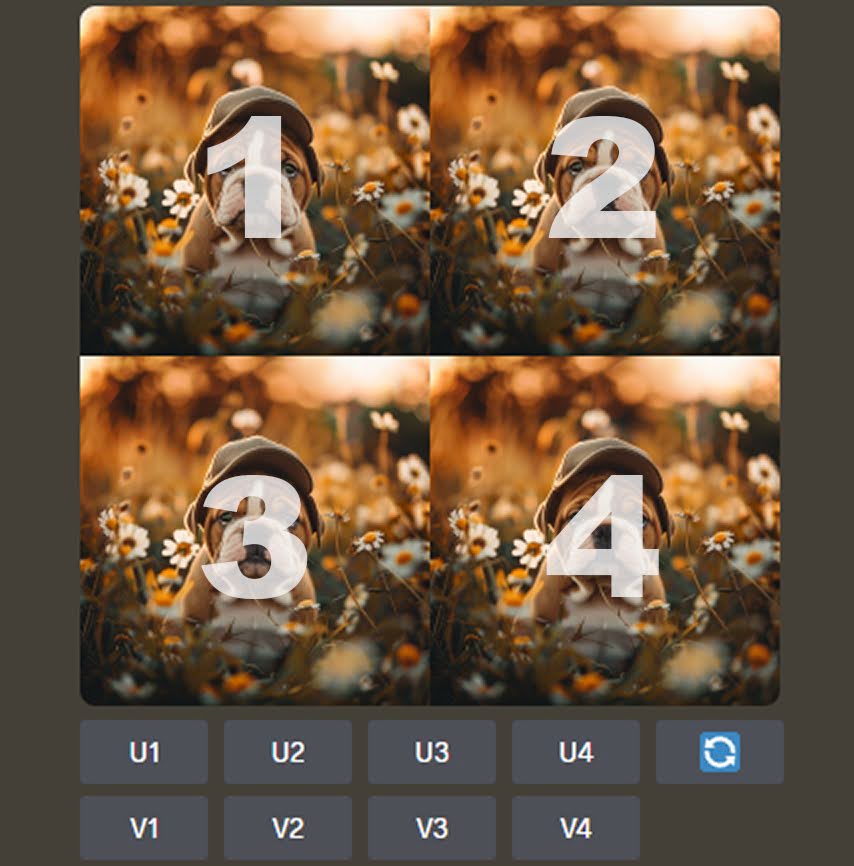
Press the U1 button to save the first image in the grid. It isolates the image and presents it with upscale and other options.
Once you’ve isolated the image you want to save, you can upscale it to a higher resolution. Simply follow the steps above to save the image, or explore the other options provided by the upscale tool.
Tips for mastering Midjourney AI
Midjourney is a powerful app that creates good images from the get-go. However, the potential for creating great images that surpass the good ones lies in your hands. By mastering a few built-in features and learning some basic knowledge, you can unlock the full potential of Midjourney AI.
Use the right words
Even though Midjourney uses a natural language interpreter, it doesn’t understand language as well as people do—or even as well as ChatGPT does.
Some keywords represent objects or subjects in the pictures, like a cat, a human, a cup, or a house. Some of them are modifiers—colors, light, shadows, painting or photography techniques, or anything else that changes the look of objects and subjects.
Midjourney AI, like any other AI system, has its limits. It can only handle a certain number of words before the possibilities become too vast for it to calculate. That’s why it’s important to use clear and concise language in your prompts. This precision allows Midjourney AI to interpret your intentions accurately, leading to better image results.
Here are some examples to illustrate the importance of prompt precision. By following these prompts, you will be able to create the exact image you want.
Don’t write “cats playing,” because it’s ambiguous and open-ended, and therefore won’t show the image you want to create.
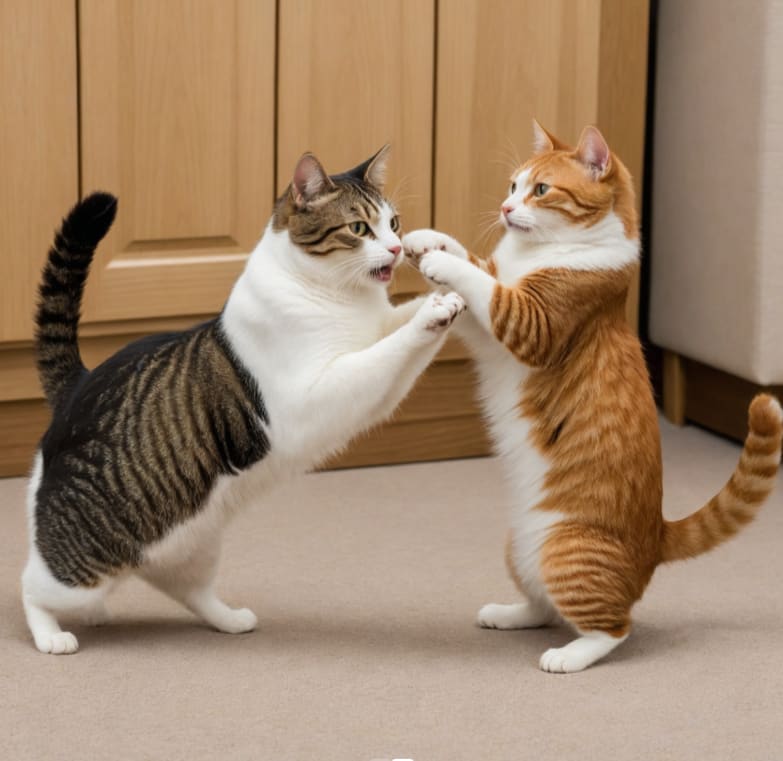
Instead, make it more precise, like “three cats playing in a field” to get the exact result of the image you have in mind.

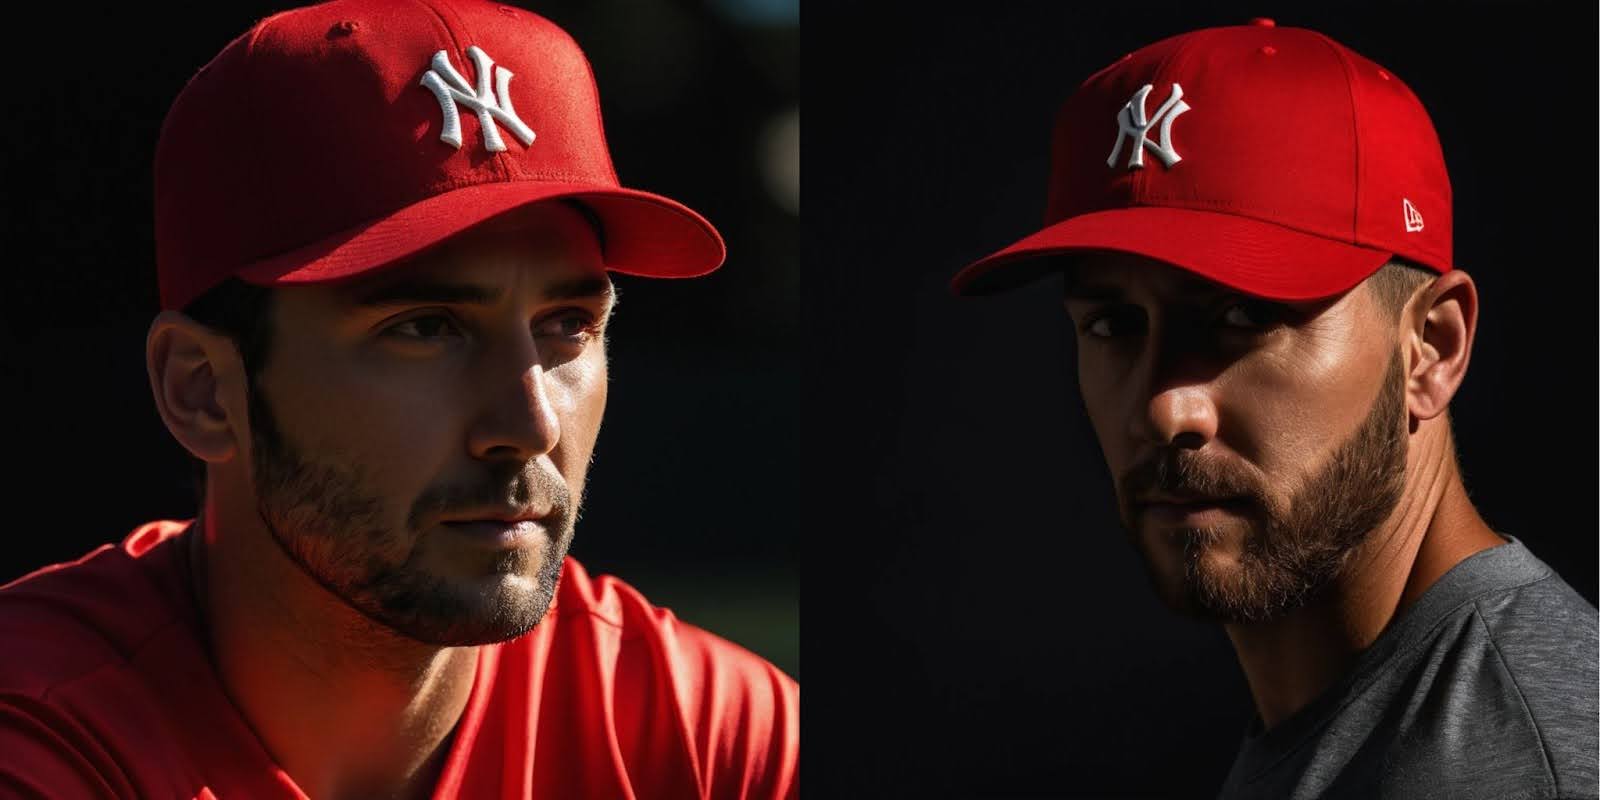
Here’s an example using the prompt “a man with a hat”:
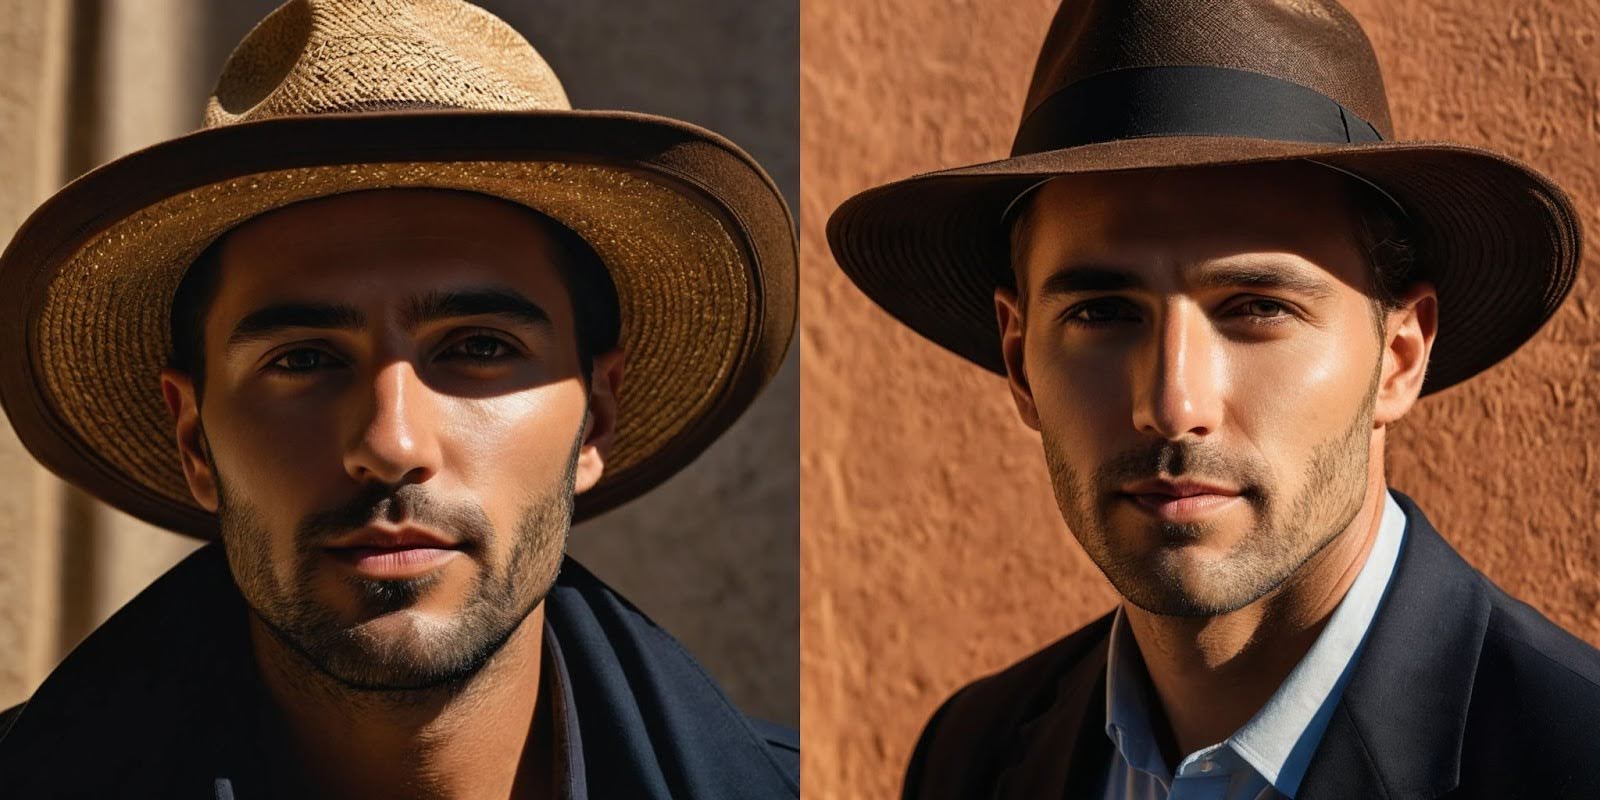
Since Midjourney has no information about the hat, it might create a fedora and or a straw hat. The result is difficult to predict.
But a more specific prompt, like “a man with a red baseball hat,” is much clearer, and the results will be more consistent.
Finding the most specific and detailed words to describe the image you want to create is the most important task to master.
Inspire Midjourney with images
When words fail to capture your vision, crafting prompts can become a daunting task. However, this incredible application offers a simple yet powerful solution.
Instead of writing a complex prompt, you can use an existing image as a reference.
To use images, you need to upload them to the server:
1. Click the “+” sign to the left of the message field at the bottom of the Discord window.

2. Click “Upload File.”

3. Choose the image you want to upload. I chose a very stylized illustration image for this example.
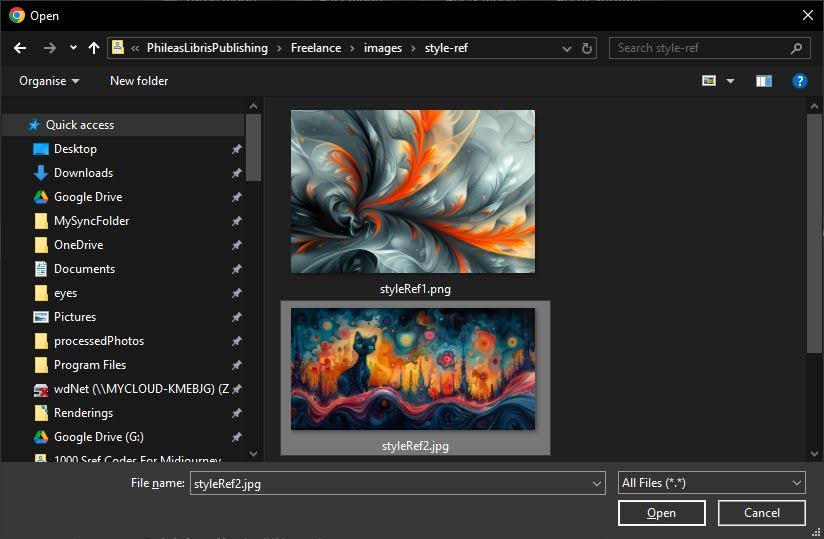
4. Click “Open.”

5. Hit “Enter,” with the cursor placed in the message field to finalize the process.
Once your image is securely stored on Midjourney’s server, accessing it is a snap.
Click on the image above the message bar, locate the “Open in Browser” link below the image, and click on it.

With the image open in a new browser window, right-click on it and select “Copy Image Address” from the menu.
Now you’re ready to use this image as a reference for Midjourney.
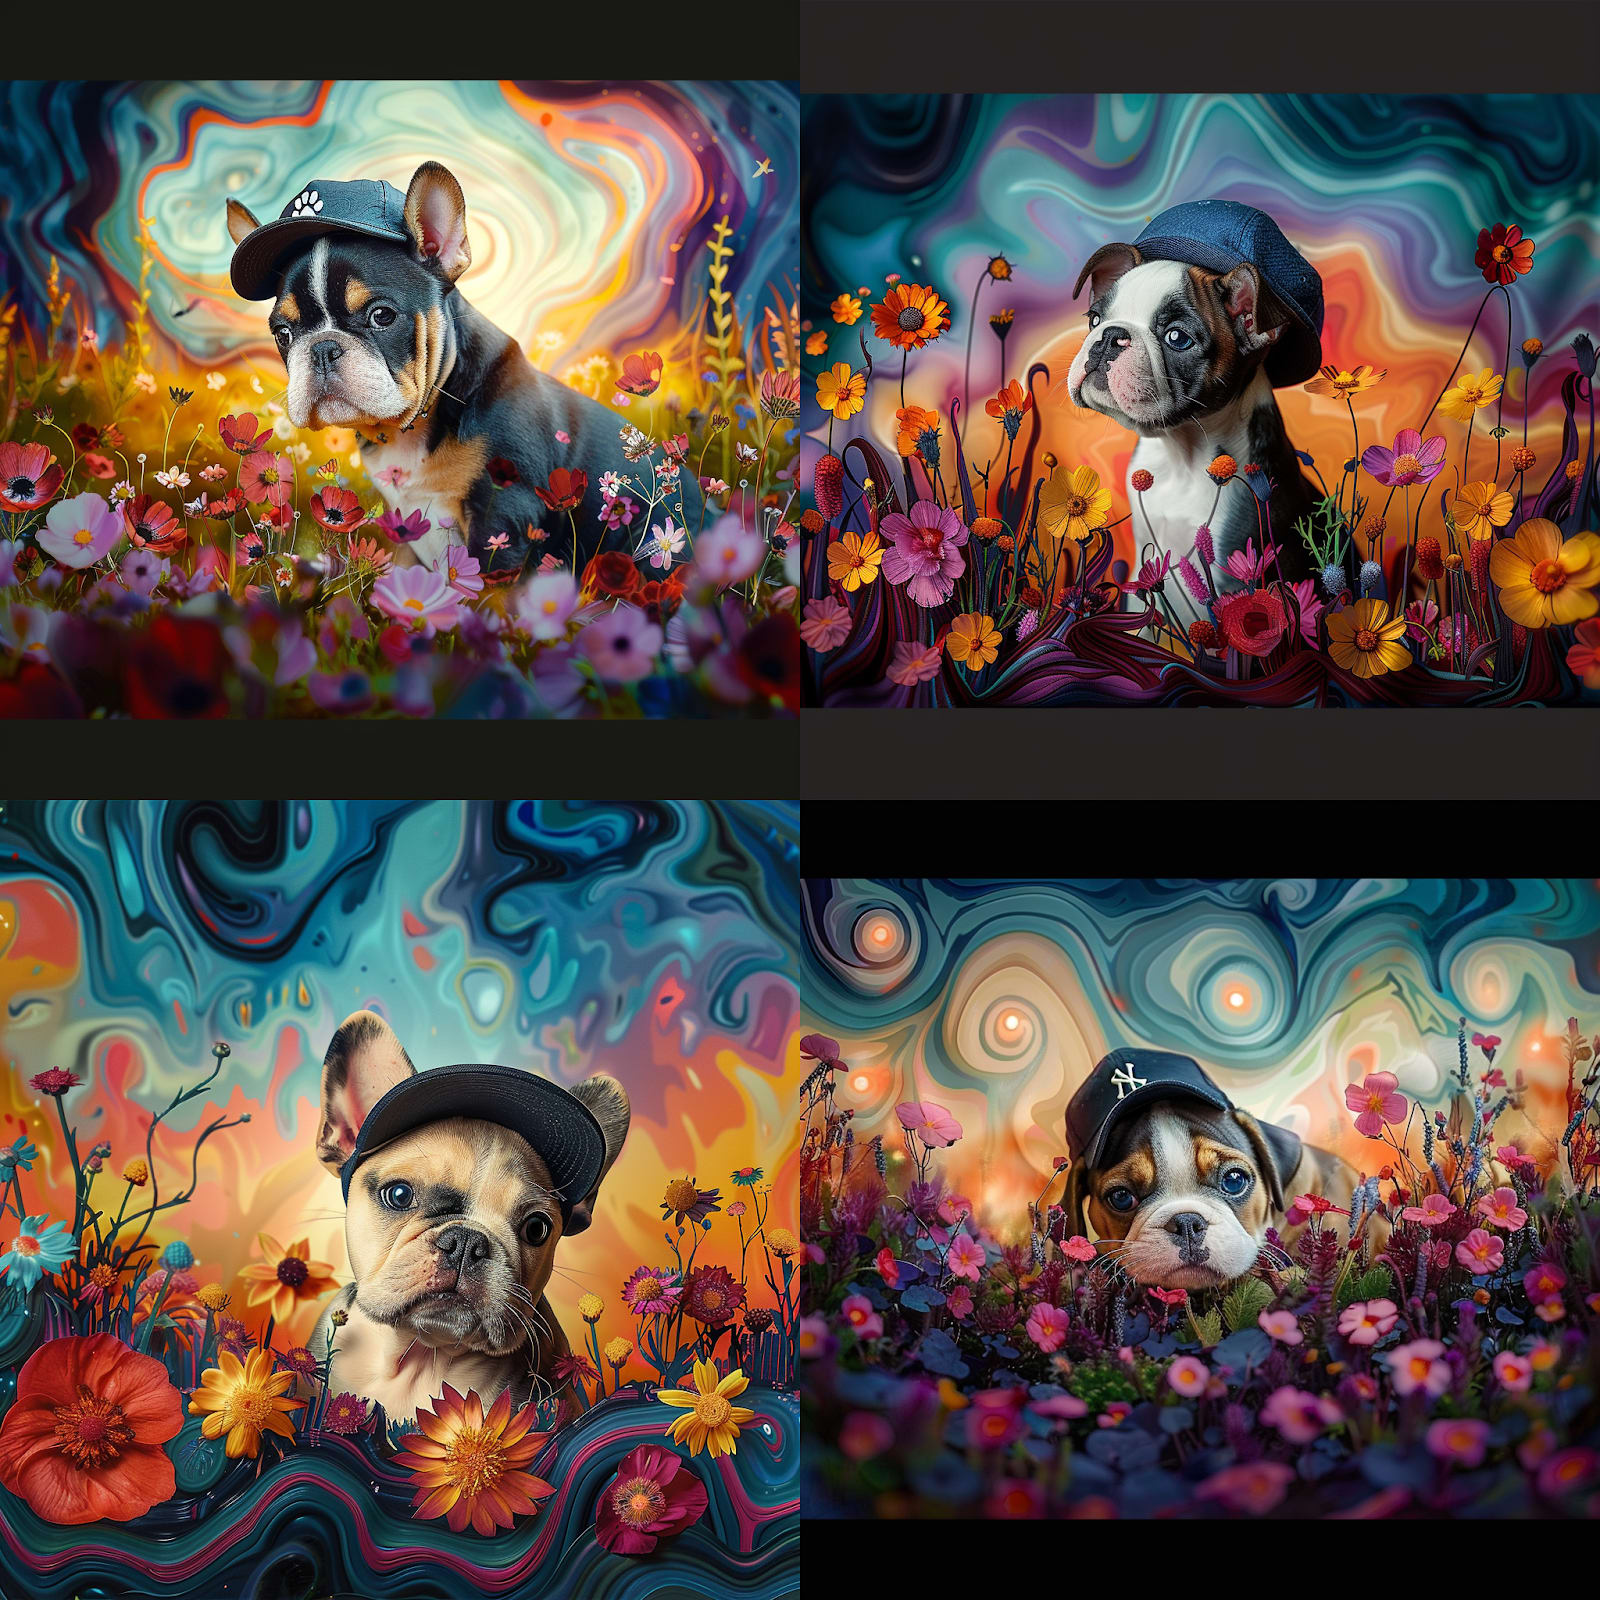
Type “/imagine” in the message window to start a new prompt, paste the link you copied, and type the prompt after that link.
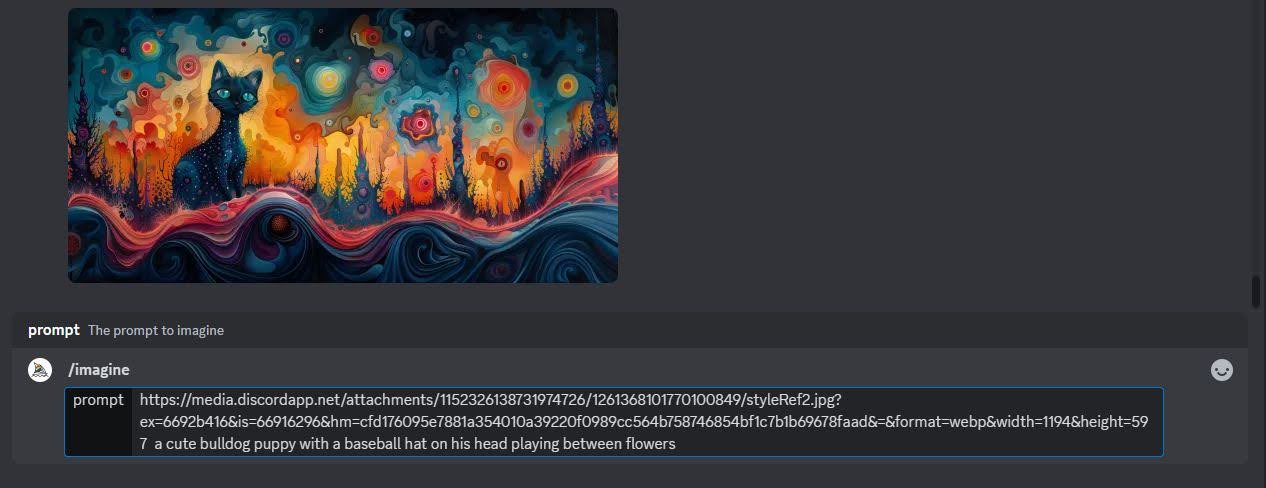
This effort pays back very quickly. Midjourney will use your reference image for inspiration and attempt to create something similar in style and spirit.
The result speaks for itself. Using reference images is the fastest way to create something in a style you want without going through complex prompt design.
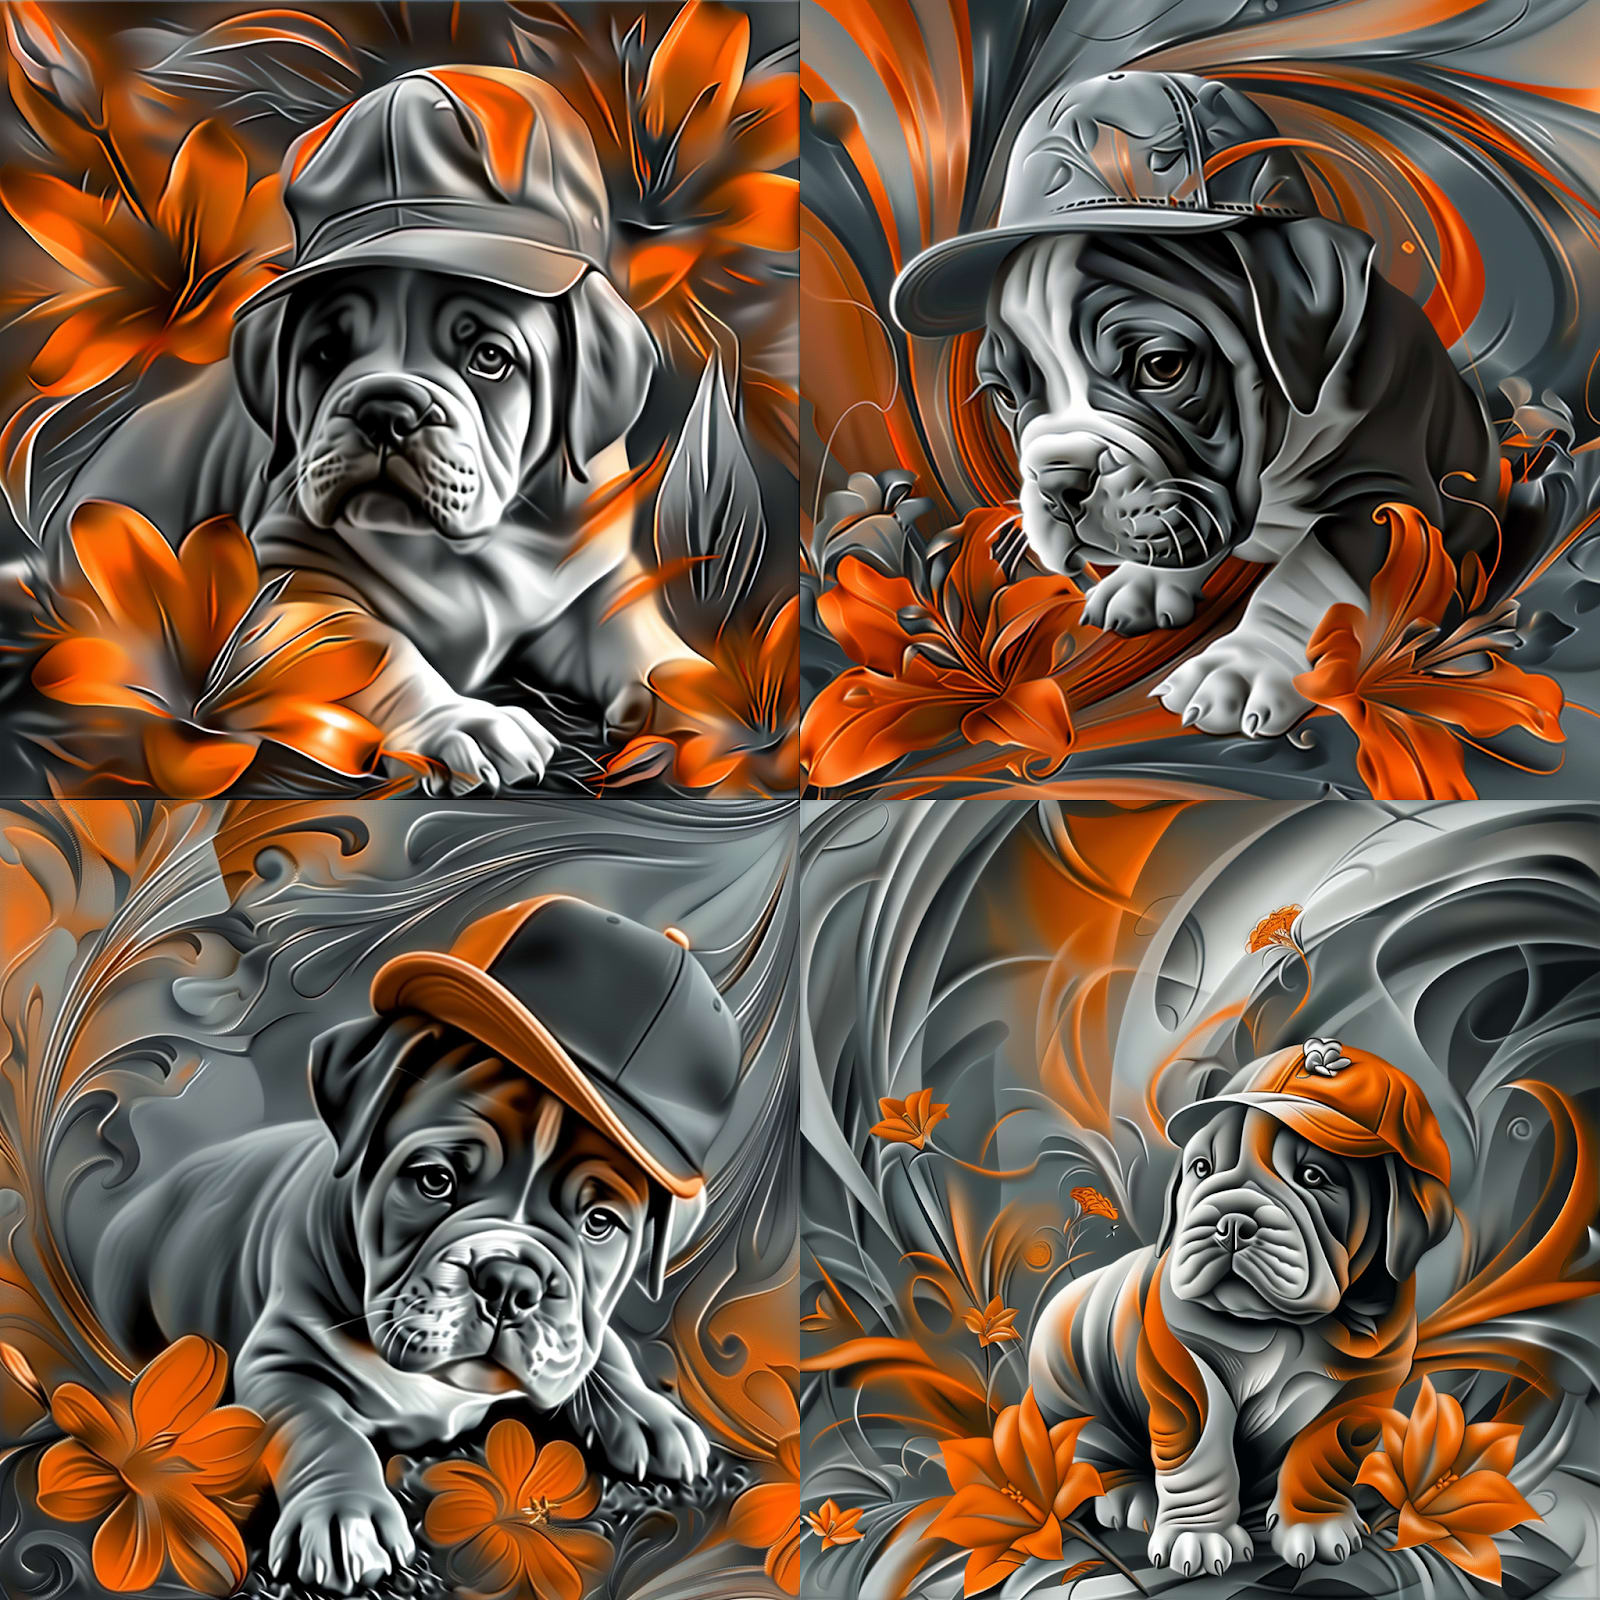
Using the style reference
Existing images can also be used as style references. When we use image reference, AI tries to emulate the composition and structure of the image. Using the style reference command, Midjourney emulates only the style: colors, artistic or photographic techniques, light, and so on. Using the style reference tool helps create artistic images, while keeping your prompts short and effective.
Job
Using style reference images is similar to using other images as references. Instead of pasting the link at the beginning of the prompt, you first type your prompt. Then, you add a style reference parameter with the link to your image, like this:
--sref [your image URL]
This helps the AI understand the style you want to emulate in your generated art.

And, as you can see, style reference can produce amazing results, while the prompt is still exactly the same as the one we started from.
Perfect your images
Even when given a very detailed prompt, Midjourney still has to work out many elements of the image by itself. This rarely creates an image that matches exactly what you had in mind. But that’s no reason to start over. Midjourney AI provides several ways to enhance and refine your images, giving you the control to achieve the results you desire.
Job
The tools to enhance your images are directly underneath the image quad you created. There are two rows of buttons; the first row contains the “Upscale” button, which increases the resolution of your image, and the “Reroll” button, which generates a new image based on the same prompt. The bottom row has “Variations” buttons, allowing you to explore different image versions.
Job
Let’s look at how these tools work and what they do:
Reroll
The first thing to try before modifying the Midjourney prompts is to reroll them. You can do this by pressing the rightmost button underneath your created images.

Remember, rerolling your prompt isn’t just about typing the same thing again. It’s a unique feature of Midjourney that allows it to learn and improve with each iteration. In fact, I’ve found that the second or third reroll often yields the best results with a given prompt, making it a valuable tool for your creative process.
As you can see, reroll created similar, yet slightly better composed and illuminated images.
Variations
Another exciting way to enhance your work is to use variations. This feature empowers you to continue the creation process in a directed way.
To explore the image of the puppy with a red beret in the previous reroll test further, let’s click the “V3” button, keep everything as it is in a pop-up window, and click "Submit.”
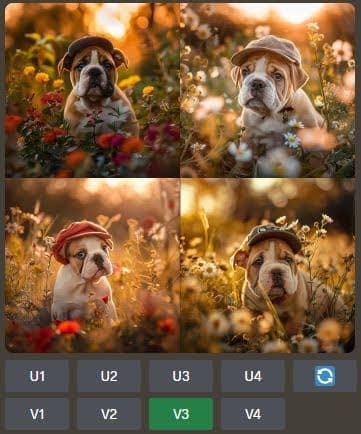
Variations create a new quad of images, using your chosen image as a starting point. This flexibility is a great way to guide Midjourney in the direction you want without having to modify the prompt, giving you the confidence to experiment and explore different possibilities.

Remix
The same “Variation” button allows you to “remix” your Midjourney images. This tool allows you to use the image you chose as a starting point, but with added elements to the prompt. This is great if you like the basic elements in the image but want to change something small, like colors or light.
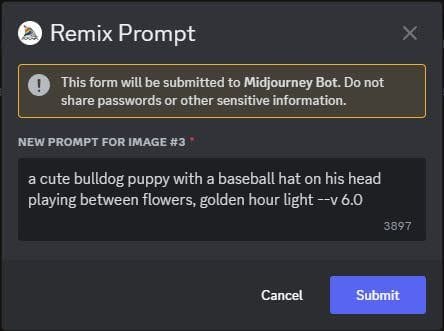
Let’s say you’re happy with the composition of the puppy image but would like to have a purple-blue background sky and purple colors in the scene.
Here’s the original image
We can add new information in the remix tool to our original prompt:
/imagine a cute bulldog puppy with a baseball hat on his head playing between purple flowers, golden hour light, deep blue and purple sky in the background
The new image retains the composition but has new colors, as instructed.
This tool is a powerful way to work on and develop your Midjourney prompts and images. It’s also perfect for learning prompting techniques and subtleties of parameters.
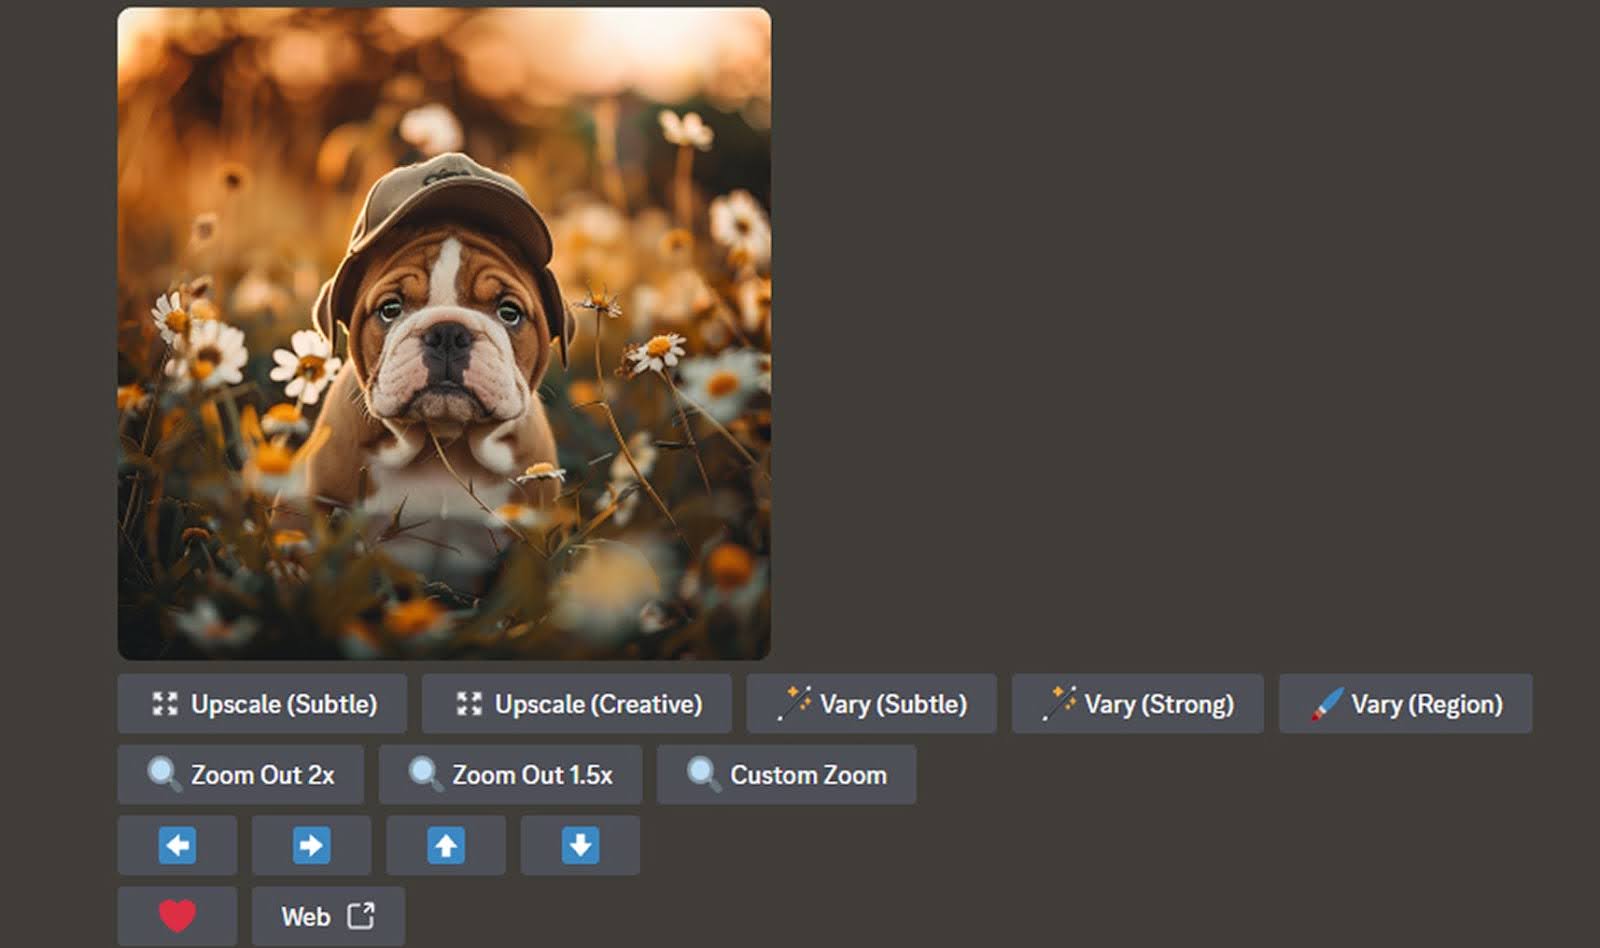
Upscale
For most practical applications, we need high-resolution images. Standard Midjourney images are good enough for social media, but for printing or other applications, it is better to upscale them with a built-in Midjourney upscale tool.
Let’s upscale the image of a puppy with the red beret. Since it’s the third image in the grid, we click on the “U3” button.

This leads us to an upscale tool window.
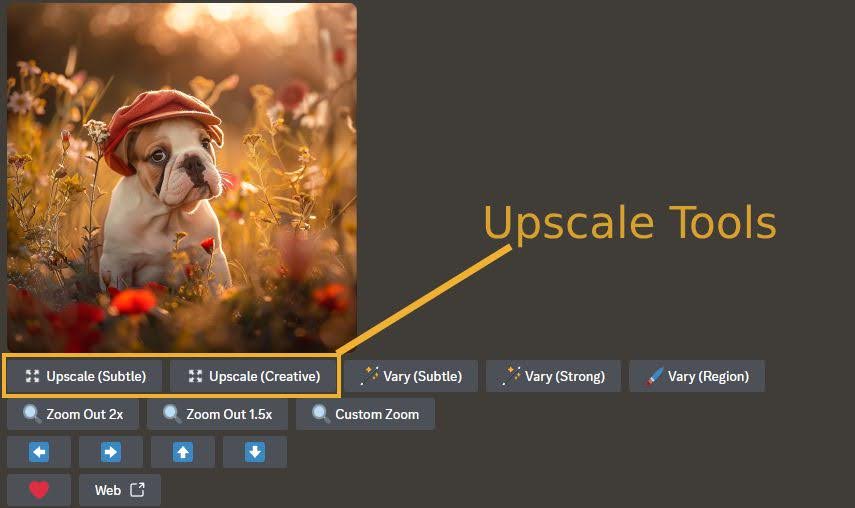
The first two buttons, “Upscale (Subtle)” and “Upscale (Creative),” are the ones we need to do the job.
Subtle upscale increases the image resolution with minimal modifications. Most of the time, this is what you need to upscale the image.
Creative upscale uses some artistic interpretation of areas poorly defined in the original image and might change a few things. But this is good—it helps to fix artifacts in the images and improve the overall look.
Vary Region
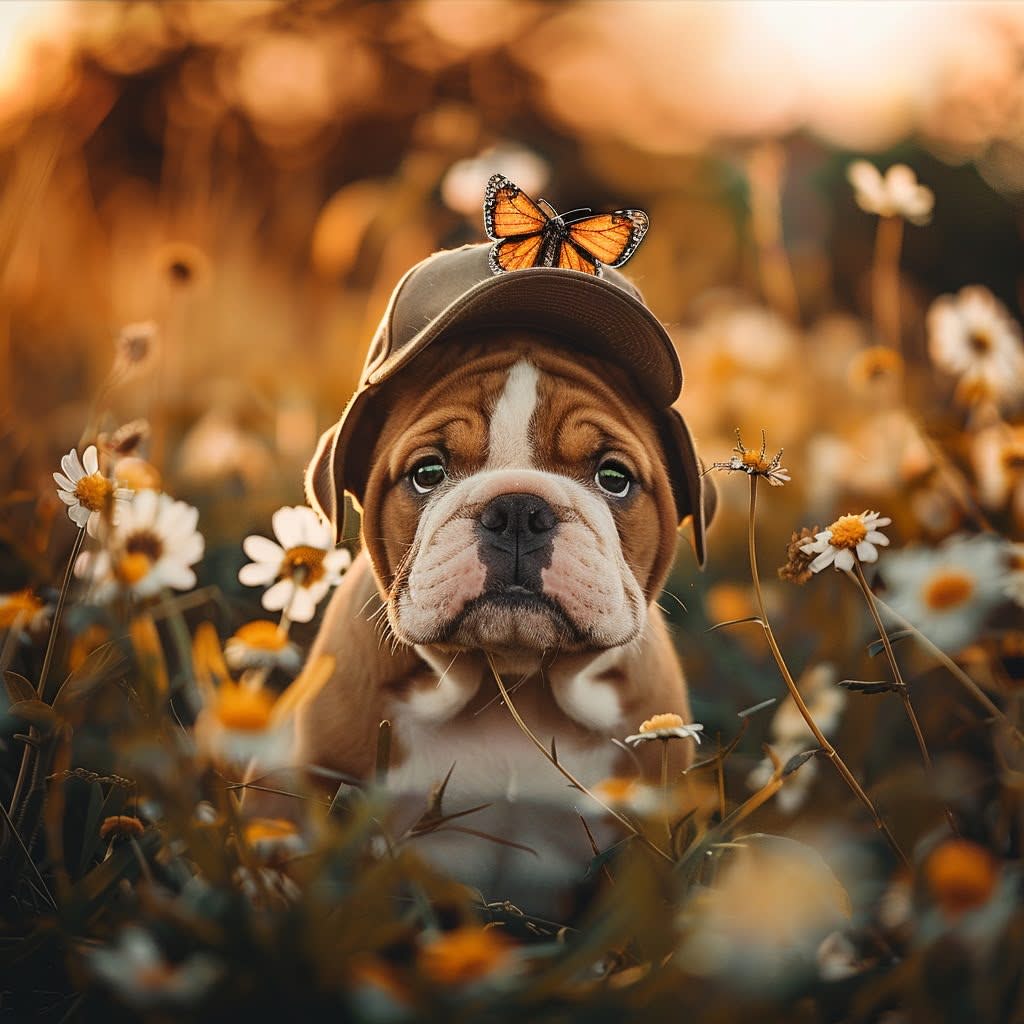
Sometimes, Midjourney creates an image that is perfect in every aspect except for a tiny detail. Or maybe an image could be improved by adding one small detail. This is where the vary region tool comes in handy.
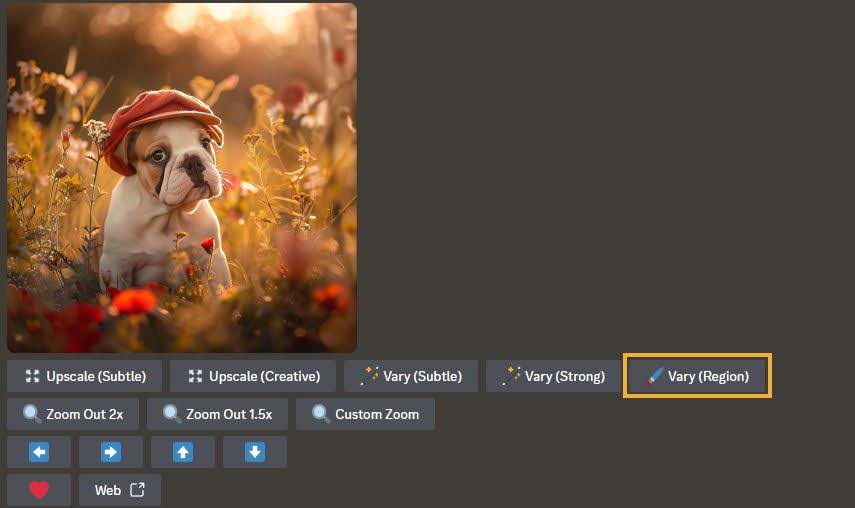
Clicking on the “Vary (Region)” button in the upscale toolbox opens a dedicated pop-up window where you can select an area that you want to modify. At the bottom of this window, your image prompt is displayed, where you can add a description of what you want to change in the Midjourney images.
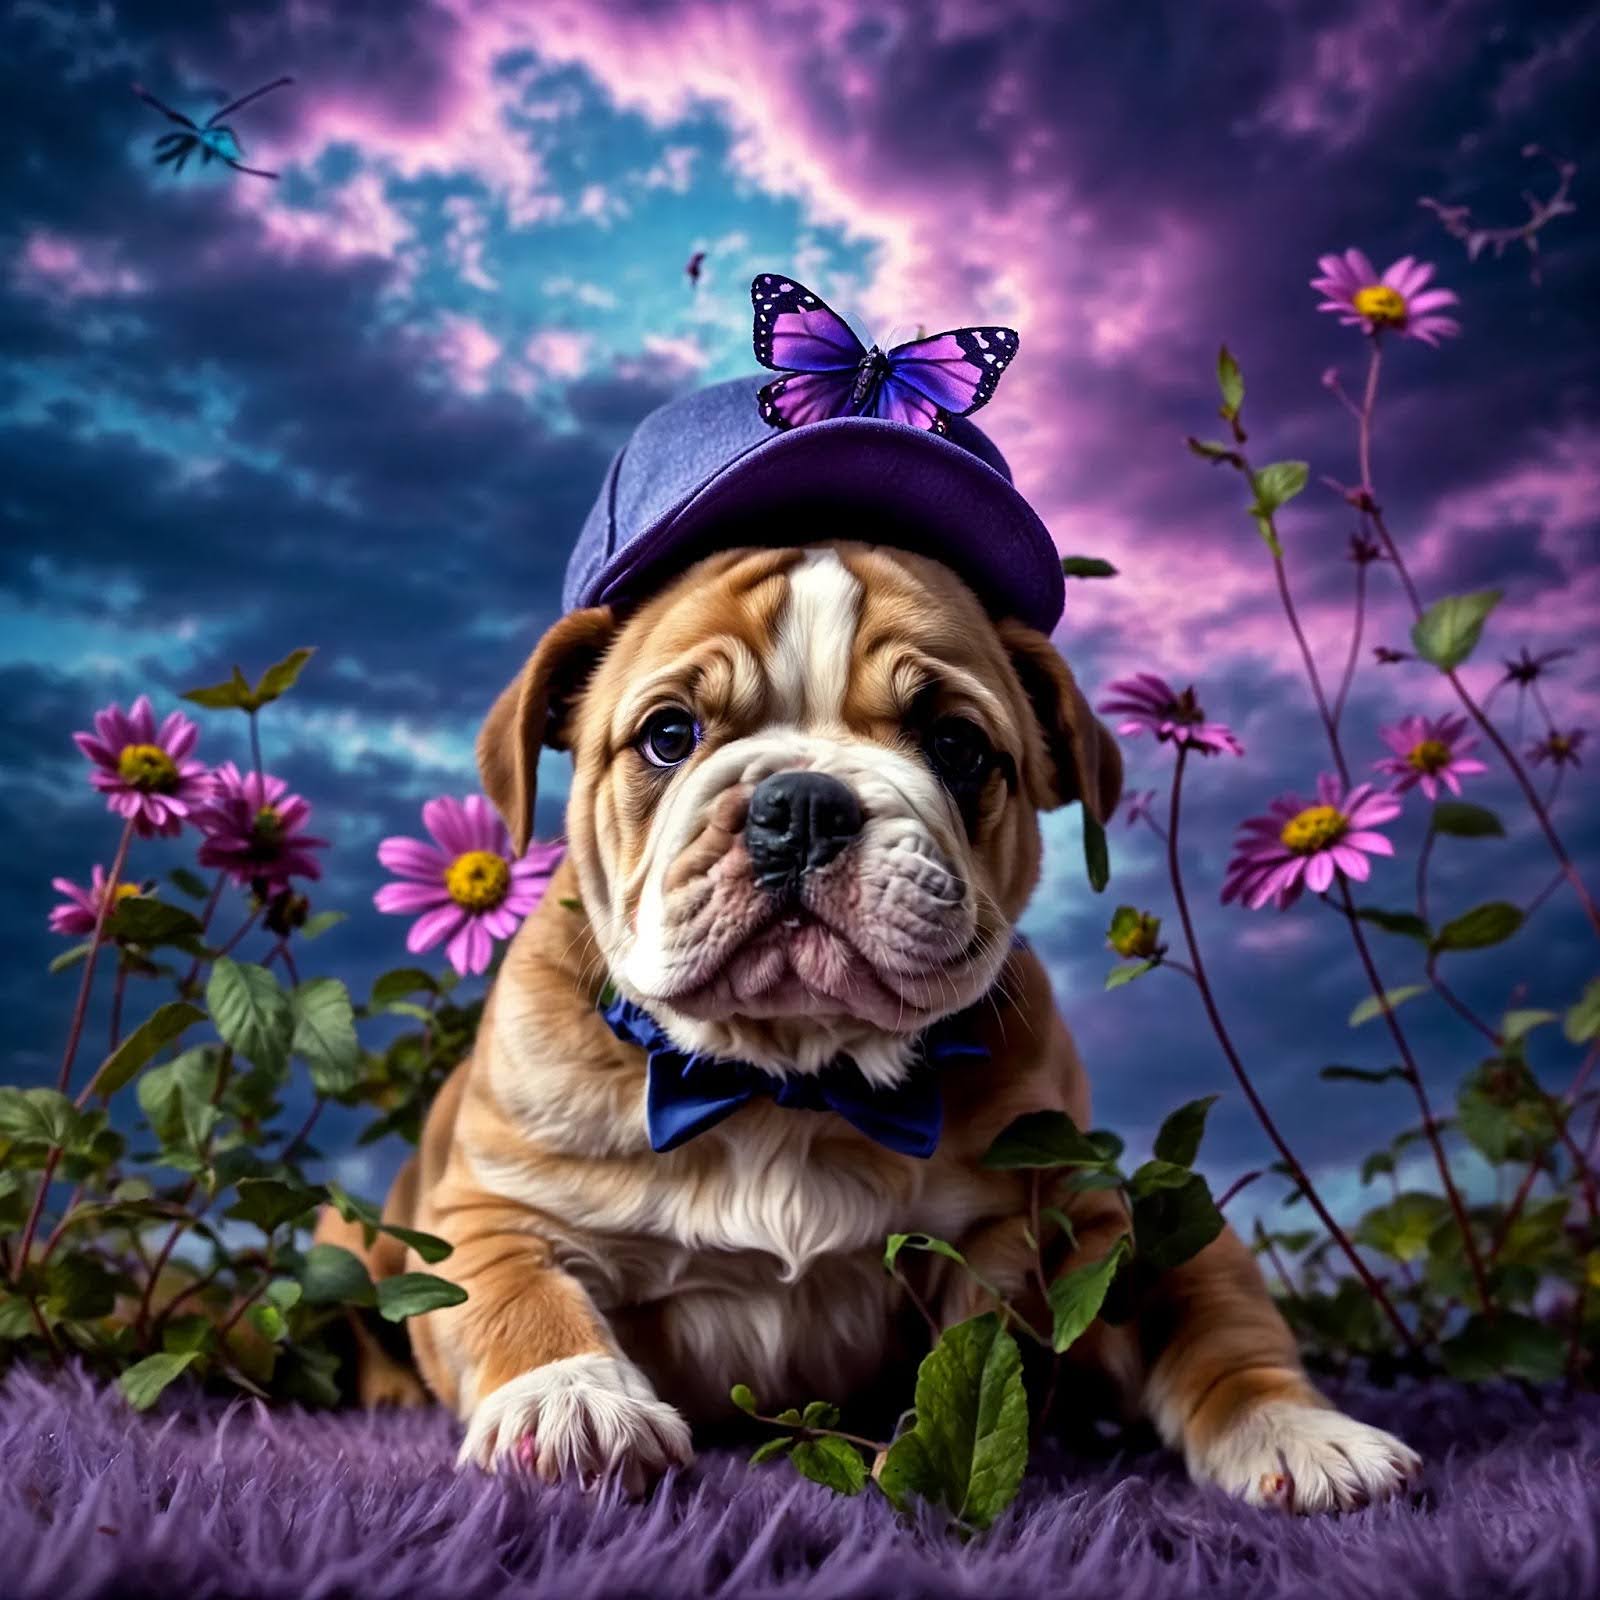
For this example, I added “a butterfly on the hat” to the original “a cute bulldog puppy with a baseball hat on his head playing between flowers, golden hour light” prompt.
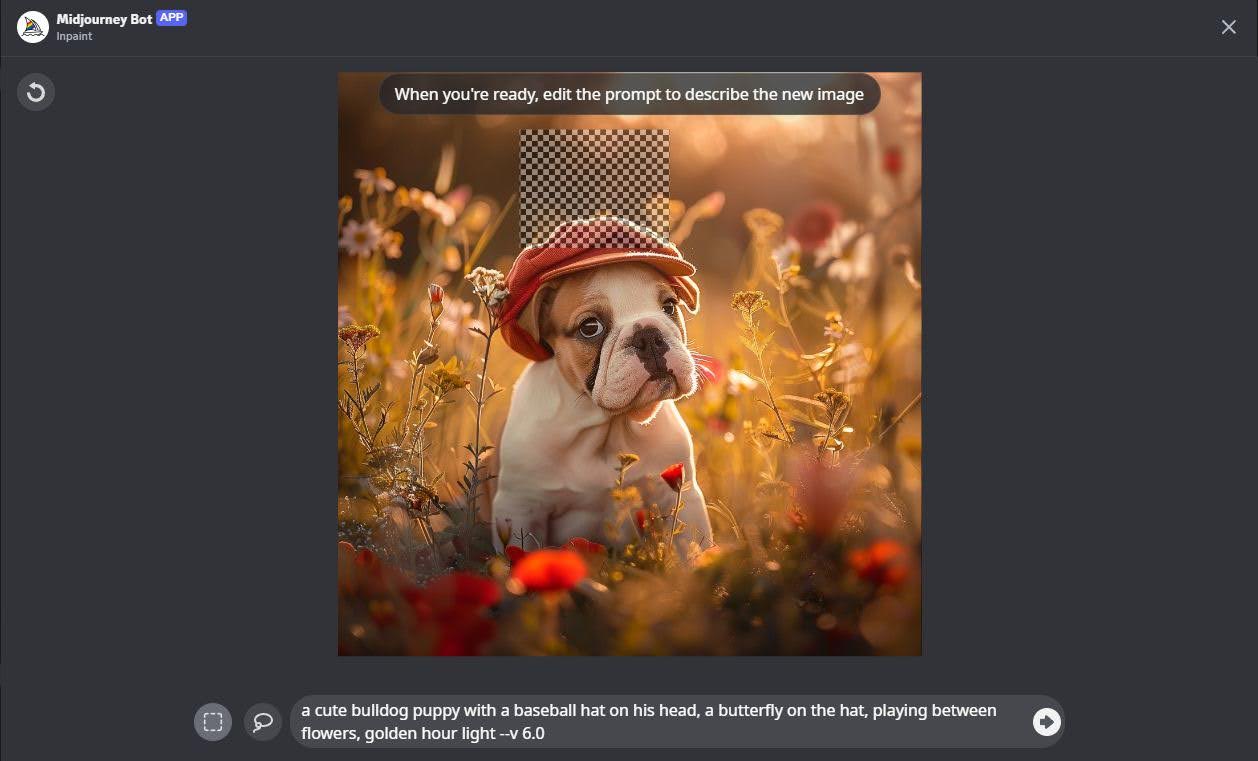
The result is a grid of four identical images we started with, but each has a variation of the butterfly on the hat.
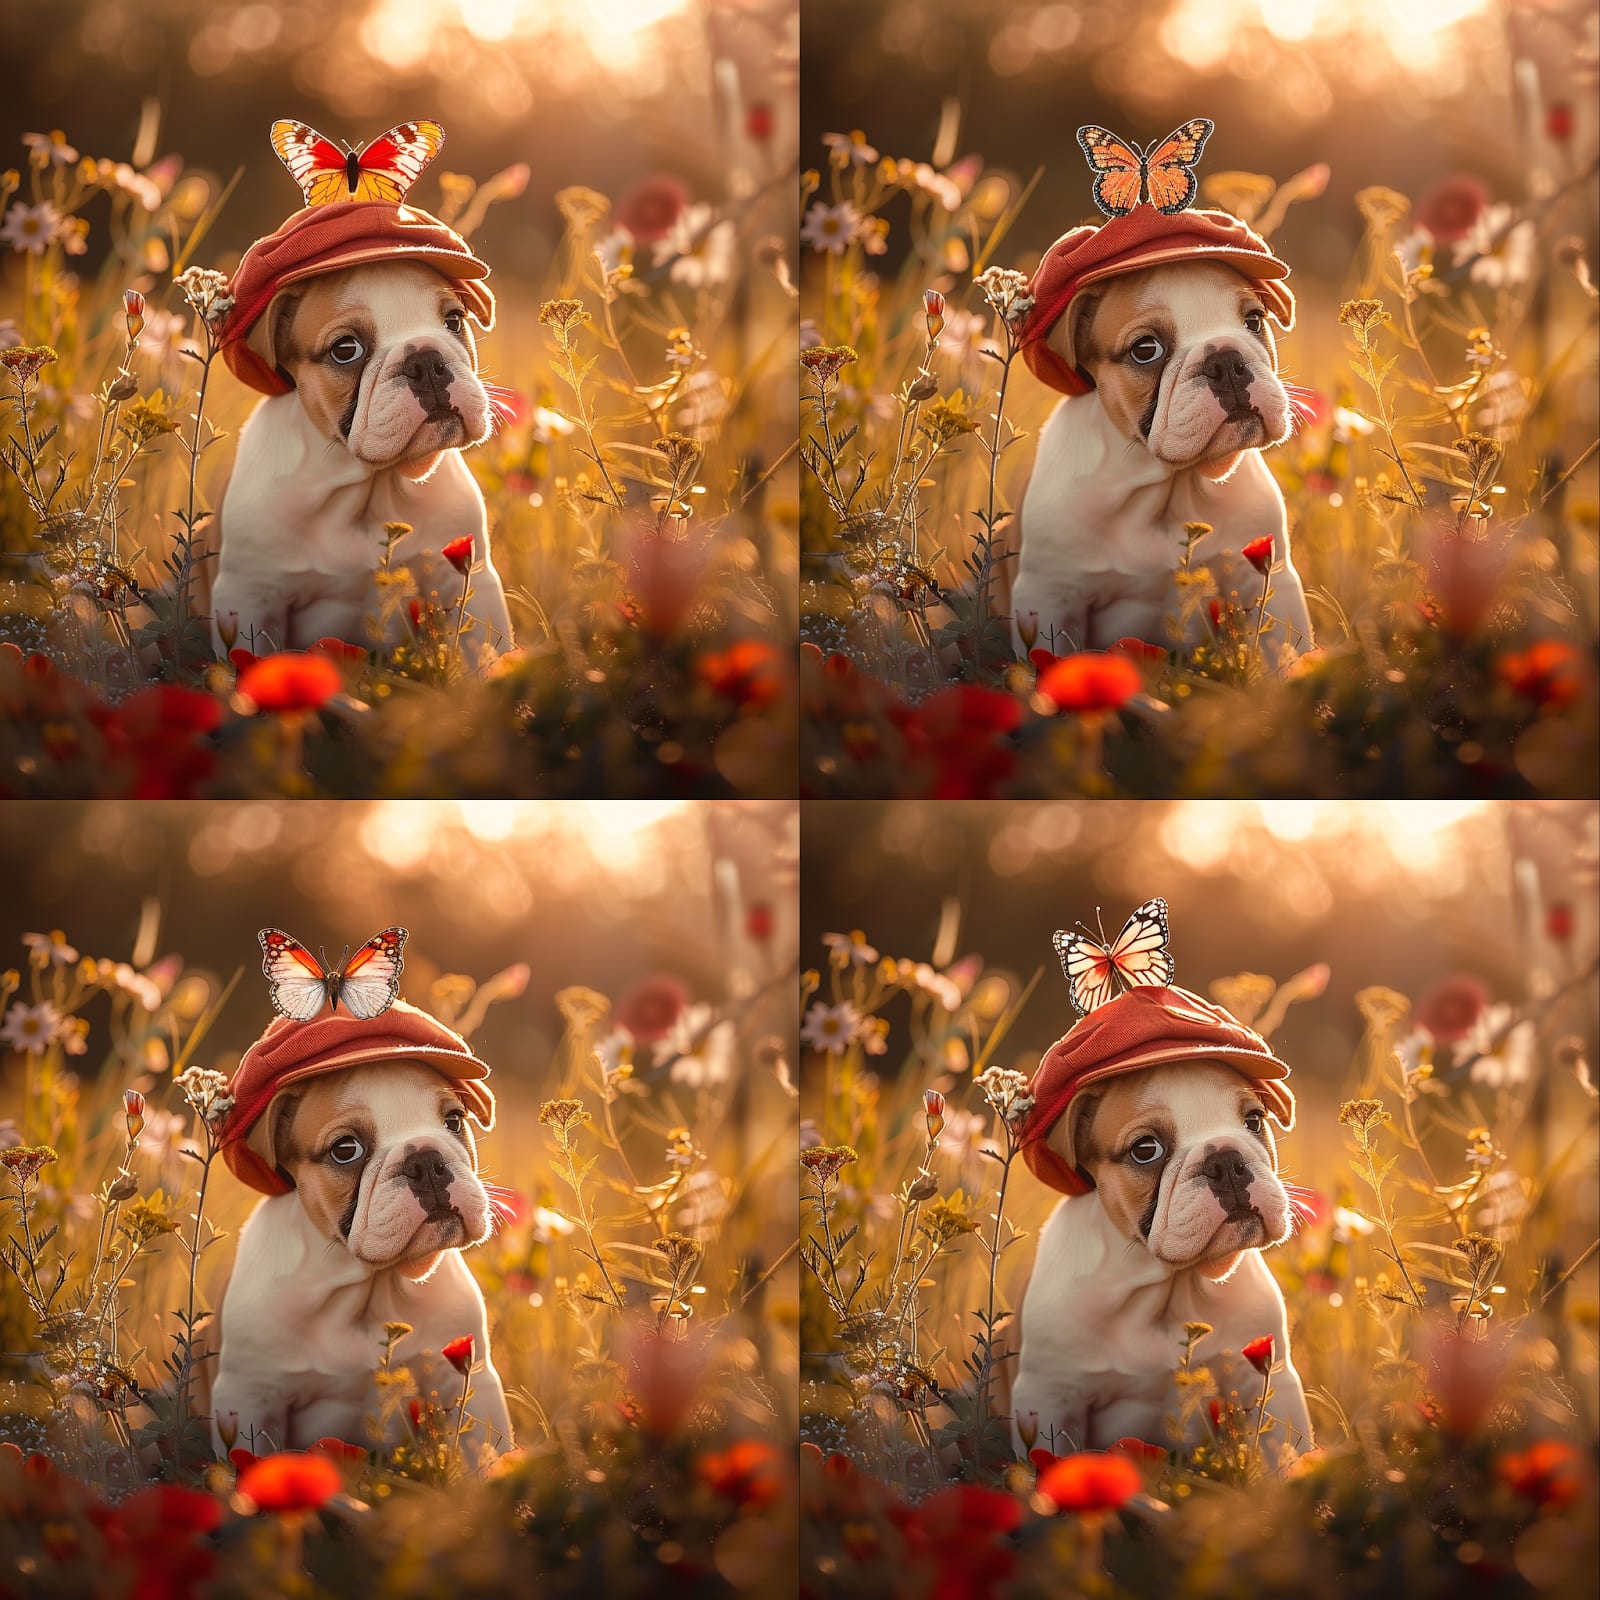
With the vary region tool, it’s possible to add or remove details, fix some artifacts, or even change the colors of the objects in the image without changing the original structure and composition of the image.
Zoom and Pan
There are cases when you create a perfect image, but maybe the subject is too close, or too centered, or the composition just doesn’t feel right. In this case, zoom and pan tools can help fix the problem without restarting from the beginning.
Both the zoom and pan tools are in the upscale toolbox.

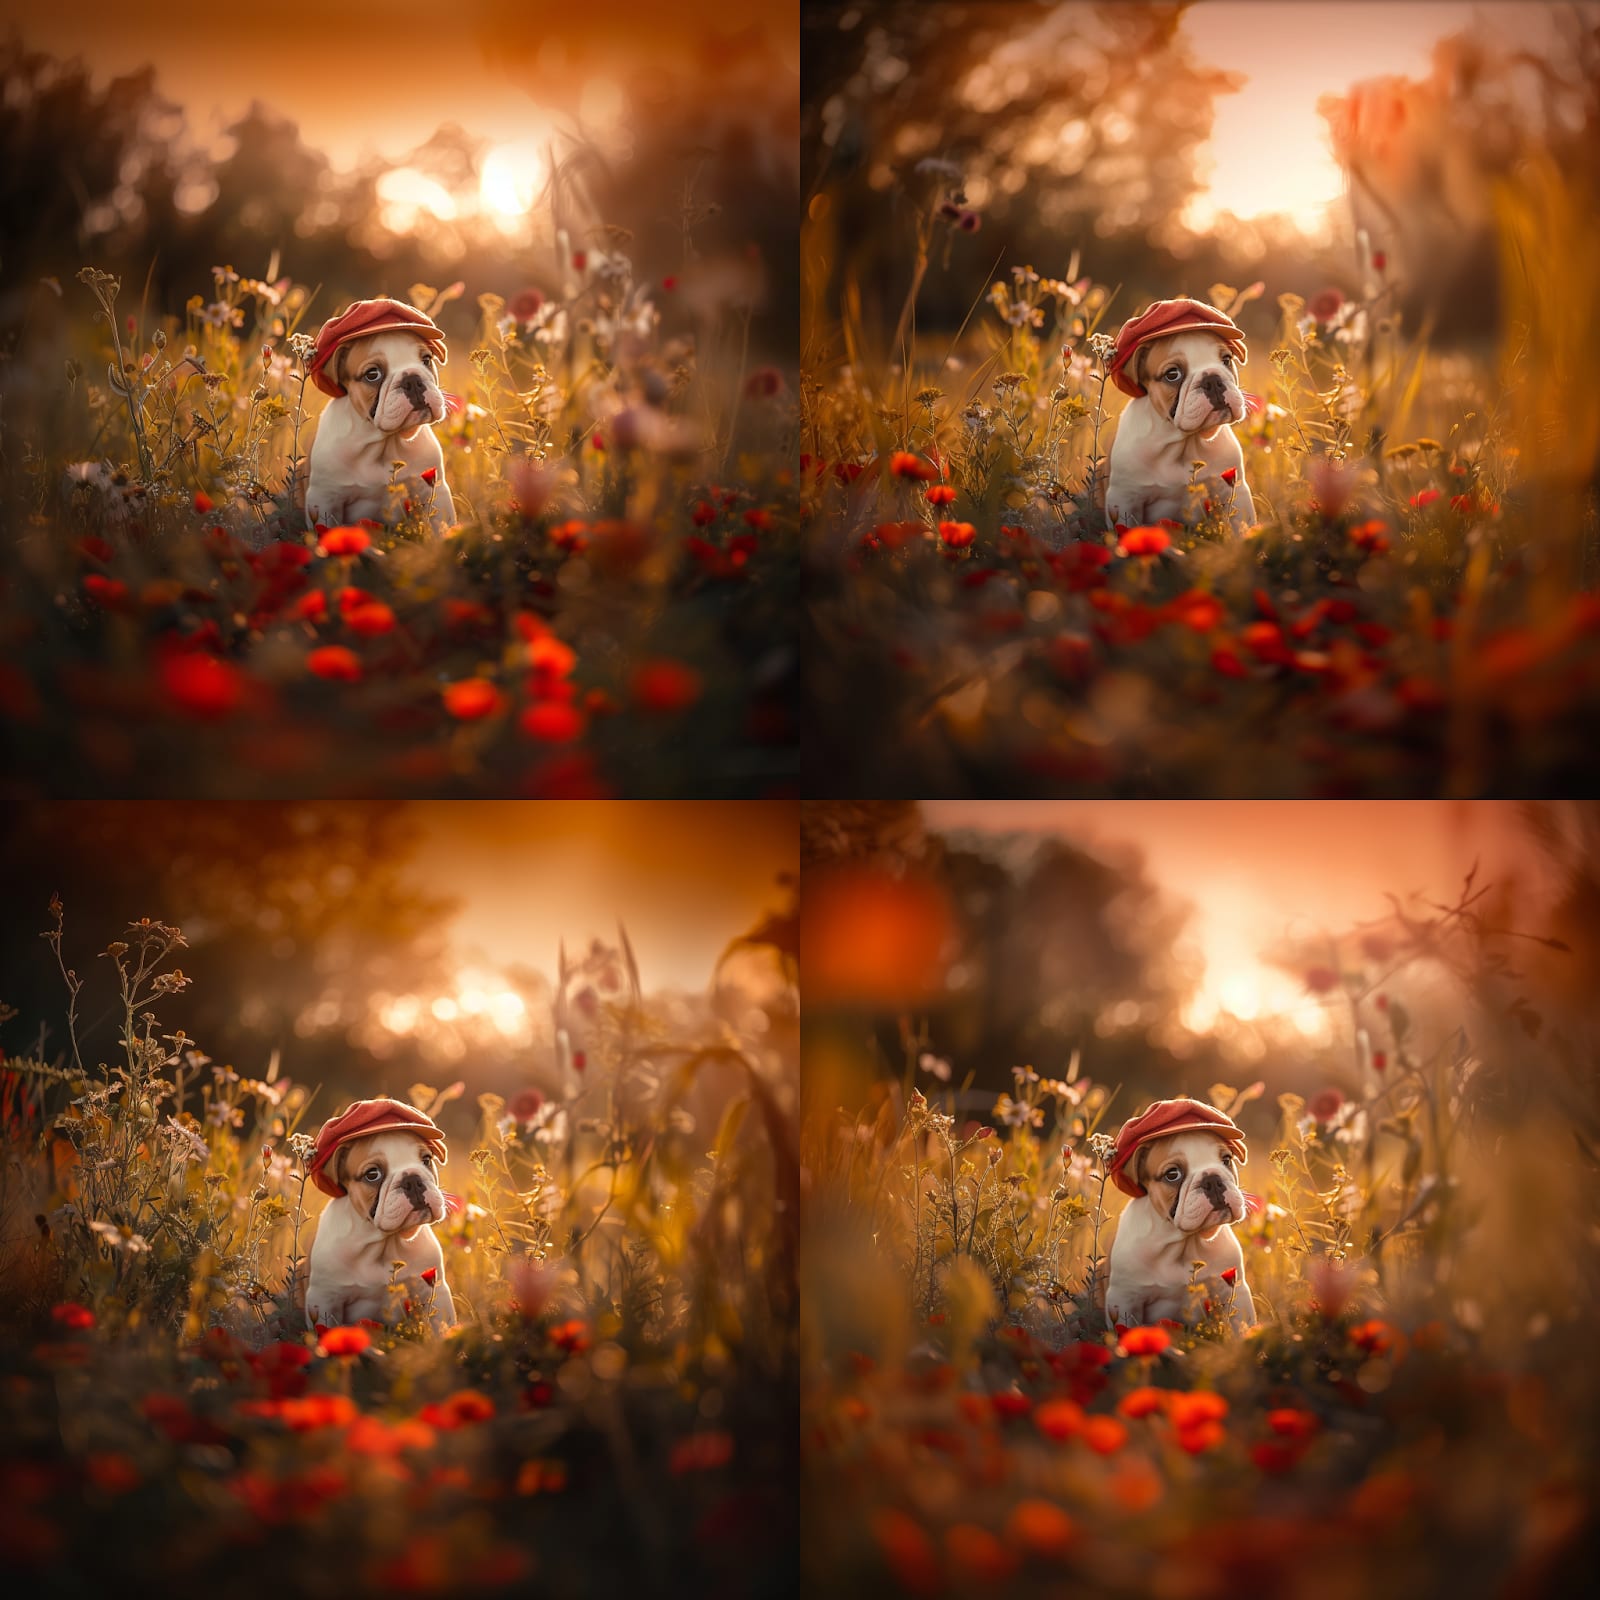
The zoom tool allows you to zoom out with magnification of 2x or 1.5x, or, using the “Custom Zoom” button you can type your own scale factor.
Here is the result of zooming out with the magnification of 2x.
Pan tools are just as easy to use and just as helpful in reframing the picture. There are four buttons, allowing you to pan left or right, up or down, represented by arrow icons.
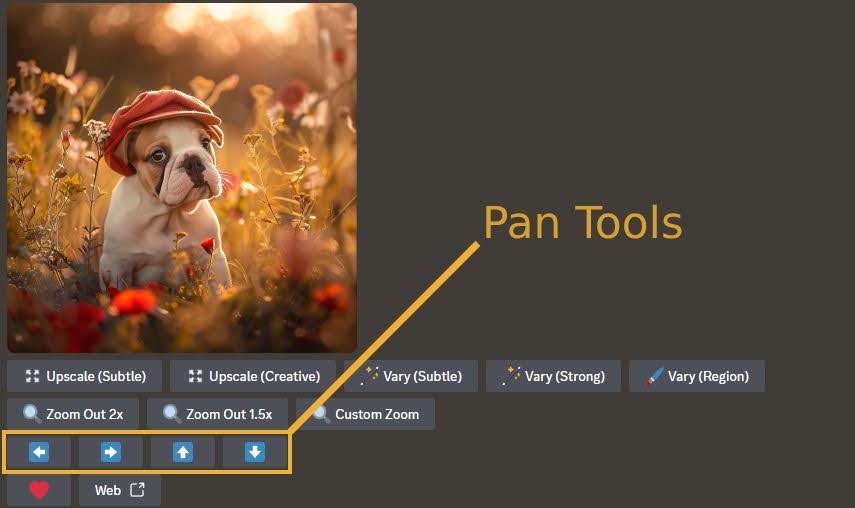
Our original image is in a square format, but I want it to be rectangular, with the puppy a little to the right. So I click on the arrow pointing to the left to expand the image in that direction.
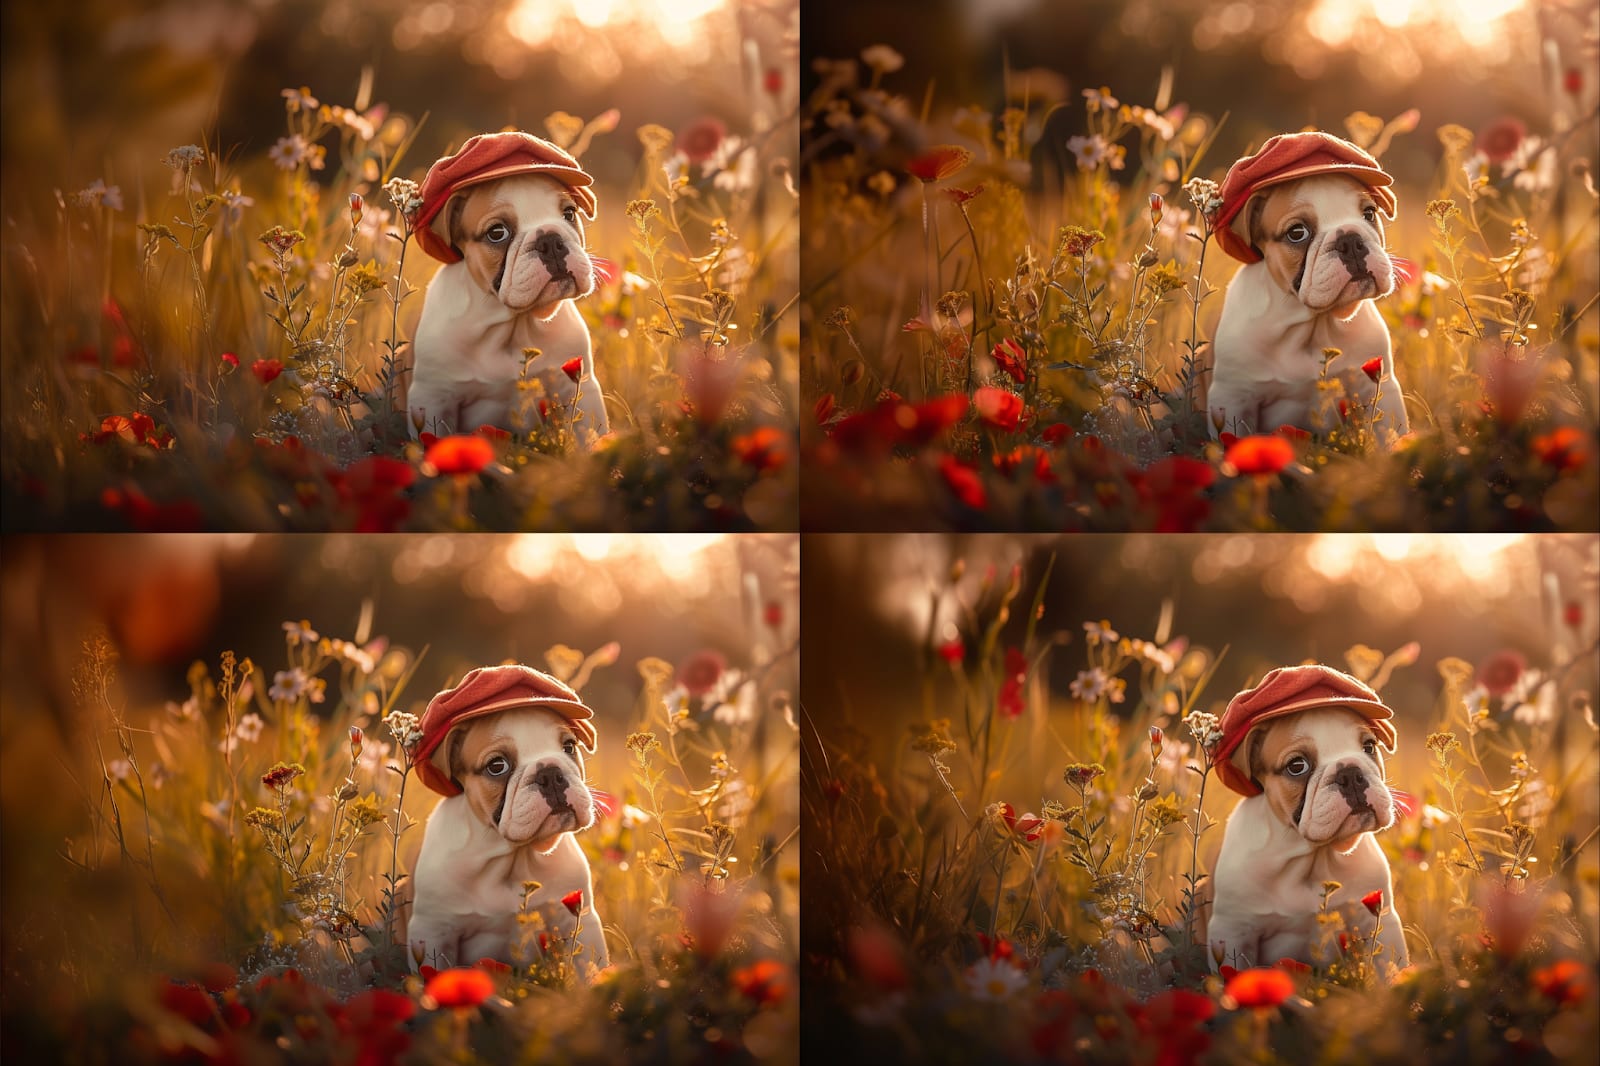
With the convenience of the zoom and pan tools, you can effortlessly adjust your image composition. Midjourney AI even creates missing areas seamlessly, all without modifying your original image.
These built-in tools give creators unparalleled power. They are easy to access and simple to use—and they work really well.
Job
Level up your Midjourney skills: Expert prompts, AI-generated art & coaching
Fiverr has Midjourney experts to help you achieve the best results in the shortest possible time.
Tutoring and guidance from an expert-level user is always the best way to learn, save money, and avoid trouble and disappointments. So, getting help from someone qualified is not only a recommended way to learn but also the best and smartest way.
There are excellent prompt engineering services available on Fiverr too, and once an expert creates prompts for you, you can learn from them further, as well as modify and adapt them for future projects.
Start generating images with Midjourney today
Midjourney is the most advanced AI image-generation app available on the market. The effort spent learning it is well justified. It puts you ahead of this technological revolution with the best tool on the market. Above all, it helps its users to succeed in many areas, producing outstanding results and paradigm shifts in those businesses.
How to use Midjourney FAQ
Is there a free trial?
Discord used to offer a free trial of Midjourney, but due to its enormous popularity and significant resource consumption, the company decided to end this option.
Job
Can I use it without Discord?
Yes and no. Although it created a web page-based interface that works without Discord, users must have at least 1,000 images already created within the Discord Midjourney server to take advantage of this option.
Also, there are advantages to using Discord: It’s a community of Midjourney users where you can pick up tips and tricks, find prompts, show your work to others, and more.
Can I sell images created with this app?
Yes, a subscription grants you commercial rights to the images created with Midjourney. But before marketing your images, there are a few things to consider.
First, most stock image sites and marketplaces have rules and regulations about AI-generated images. The most stringent rules concern copyright infringement and the ethical use of AI.
It is unacceptable to create and market images featuring recognizable celebrities and people of fame. Using brand names and famous creators in prompts is also a copyright infringement. So, follow strict ethical rules when creating your Midjourney images.
Job
Are these images censored?
No, they are not directly censored, but prompts are. It’s impossible to give Midjourney “not safe for work” prompts. Occasionally, it creates some images containing partial nudity or something similar. But it’s possible to report these images immediately, if that’s what you want.
Related Guides
 16 minute reading
 18 minute reading10 minute reading
 11 minute reading

Comments
Post a Comment